---
title: "Step 2: Add settings"
space: "Commera"
url: "https://docs.bwh.tech/commera/build-a-plugin/add-settings"
updated: "2026-10-09"
---
In this step, you add a Qikink Settings DocType for the API keys, and you show it as a tab in the Commera settings.
Commit: [feat: add qikink settings and its commera settings tab](https://github.com/Rl0007/commera_qikink/commit/7717384).
## What you'll build
- A Single DocType, **Qikink Settings**, with the API keys, the supplier and the buying price list.
- `commera/settings/index.vue`, a **Qikink** tab in the Commera settings.
## 1. Create the Qikink Settings DocType
1. In Desk, open the **DocType** list and click **Add DocType**.
2. Set **Name** to `Qikink Settings`.
3. Set **Module** to `Qikink`.
4. Leave **Custom?** cleared, so that Frappe writes the DocType into your app.
5. Tick **Is Single**.
6. Add these fields:
| Label | Type | Options | Default |
| --- | --- | --- | --- |
| Client ID | Data | | |
| Client Secret | Password | | |
| Sandbox | Check | | 1 |
| Supplier | Link | Supplier | |
| Buying Price List | Link | Price List | |
7. In **Permissions**, give **System Manager** read and write.
8. Click **Save**.
Frappe writes the DocType to `commera_qikink/qikink/doctype/qikink_settings/`. It does this only because `developer_mode` is on. Commit these files with your plugin.
The plugin uses **Supplier** and **Buying Price List** from step 4 onwards. Qikink ships the products, so the store buys each Qikink line from this supplier.
:::caution[Each row saves alone]
The Commera settings tab saves one row at a time, while the other rows can still be blank. A field that you mark **Mandatory** shows a `*`, and the tab does not let a user clear it after it is set. This tutorial keeps **Client ID** and **Client Secret** optional, and the API client checks them before it calls Qikink. If your controller has a `validate`, it must allow blank fields.
:::
## 2. Add the settings tab
In `apps/commera_qikink`, run `bench commera add settings`. Replace the `commera/settings/index.vue` it writes with this:
```vue
```
`icon` is optional; without it the entry uses the plugin's icon (`commera/plugin-icon.svg`).
With `doctype` set, Commera draws one row for each field of the Single. Each row saves itself when you leave it. You write no template.
Build the plugin with `bench build --app commera_qikink`, or keep `yarn dev` running in `apps/commera/dashboard`.
## Check it works
1. Open `/commera` and click **Settings**.
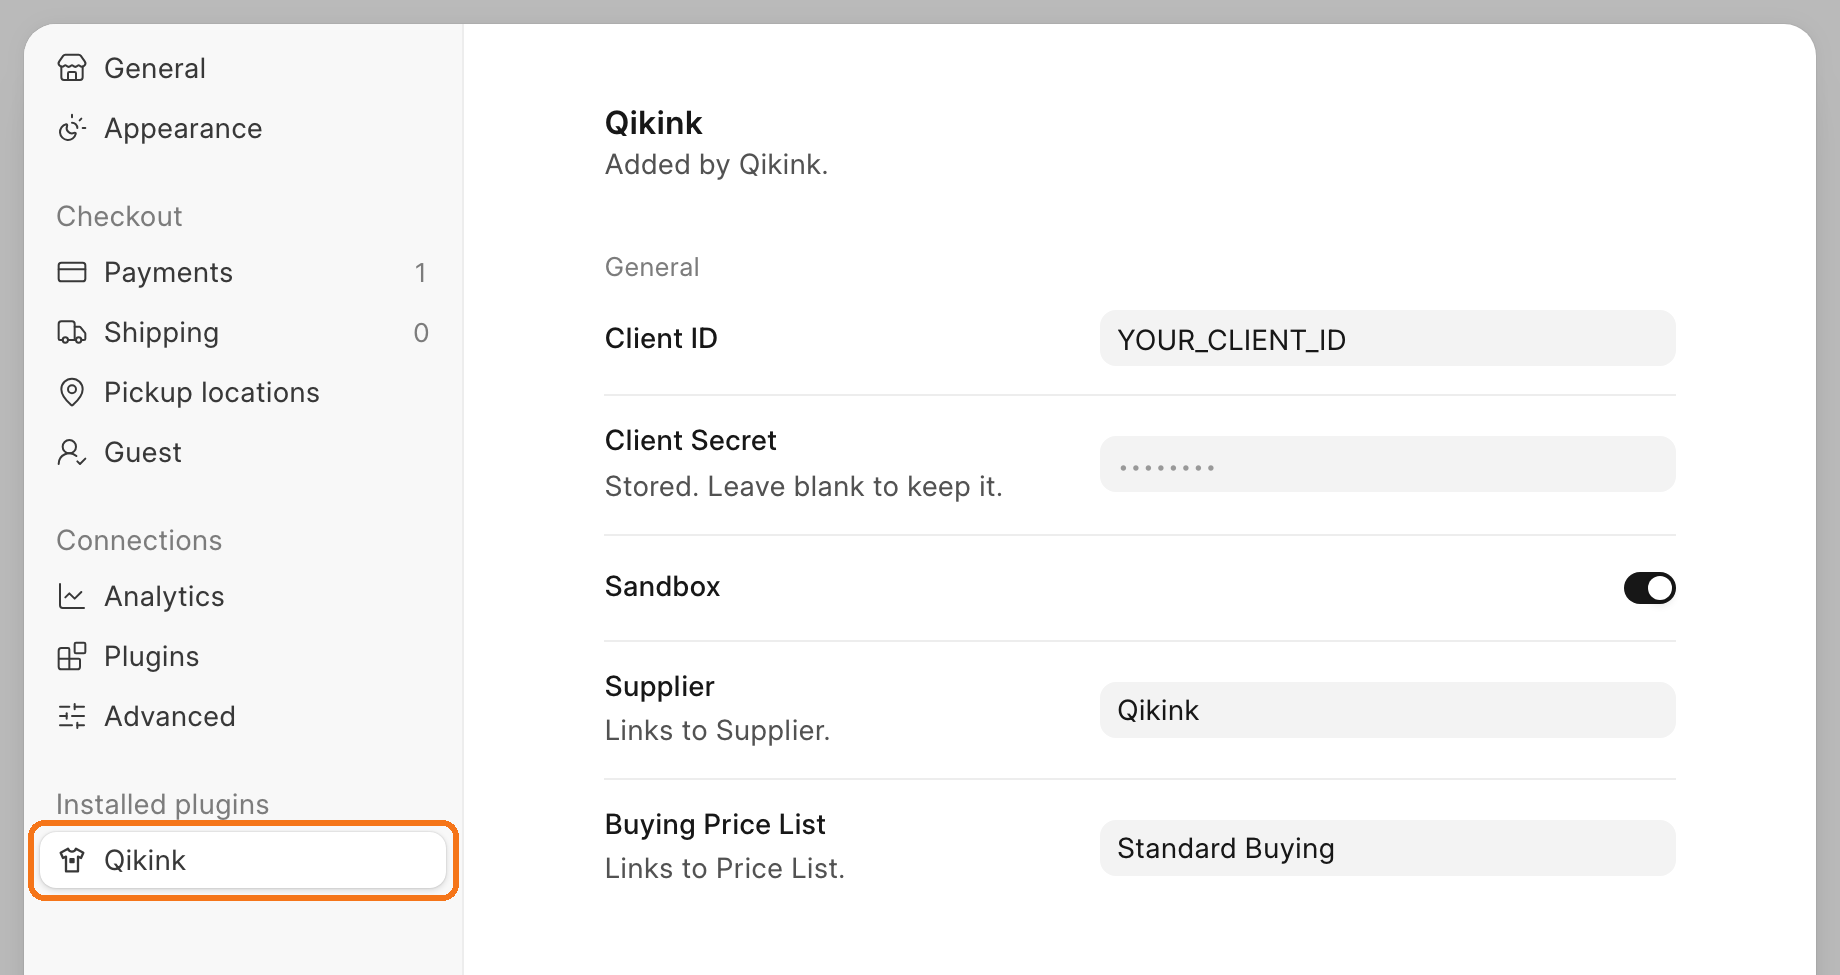
2. Under **Installed plugins**, click **Qikink**. The tab shows the five fields.
3. In **Client ID**, type the Client ID from your Qikink dashboard, then click outside the field. A toast shows "Client ID saved".
4. Fill in **Client Secret** the same way.
5. Make sure that **Sandbox** is on.
 :::note[Buying Price List is already filled in]
On a fresh site, **Buying Price List** shows "Standard Buying" before you set it. Frappe fills a Link field from the global default that has the same field name, and ERPNext sets a default for `buying_price_list`. It is not old data.
:::
## Next steps
- [Step 3: Connect to Qikink](/commera/build-a-plugin/connect-to-qikink)
- [Dashboard entries](/commera/plugin-reference/dashboard-entries): settings tabs with your own template
:::note[Buying Price List is already filled in]
On a fresh site, **Buying Price List** shows "Standard Buying" before you set it. Frappe fills a Link field from the global default that has the same field name, and ERPNext sets a default for `buying_price_list`. It is not old data.
:::
## Next steps
- [Step 3: Connect to Qikink](/commera/build-a-plugin/connect-to-qikink)
- [Dashboard entries](/commera/plugin-reference/dashboard-entries): settings tabs with your own template