---
title: "Add your first product"
space: "Commera"
url: "https://docs.bwh.tech/commera/set-up-your-store/first-product"
updated: "2026-09-21"
---
Create one sellable product with a price, sizes and a photo, and see it live on your storefront.
## Before you start
Finish [Welcome to Commera](/commera/set-up-your-store/welcome) so you know your way around the dashboard.
## Steps
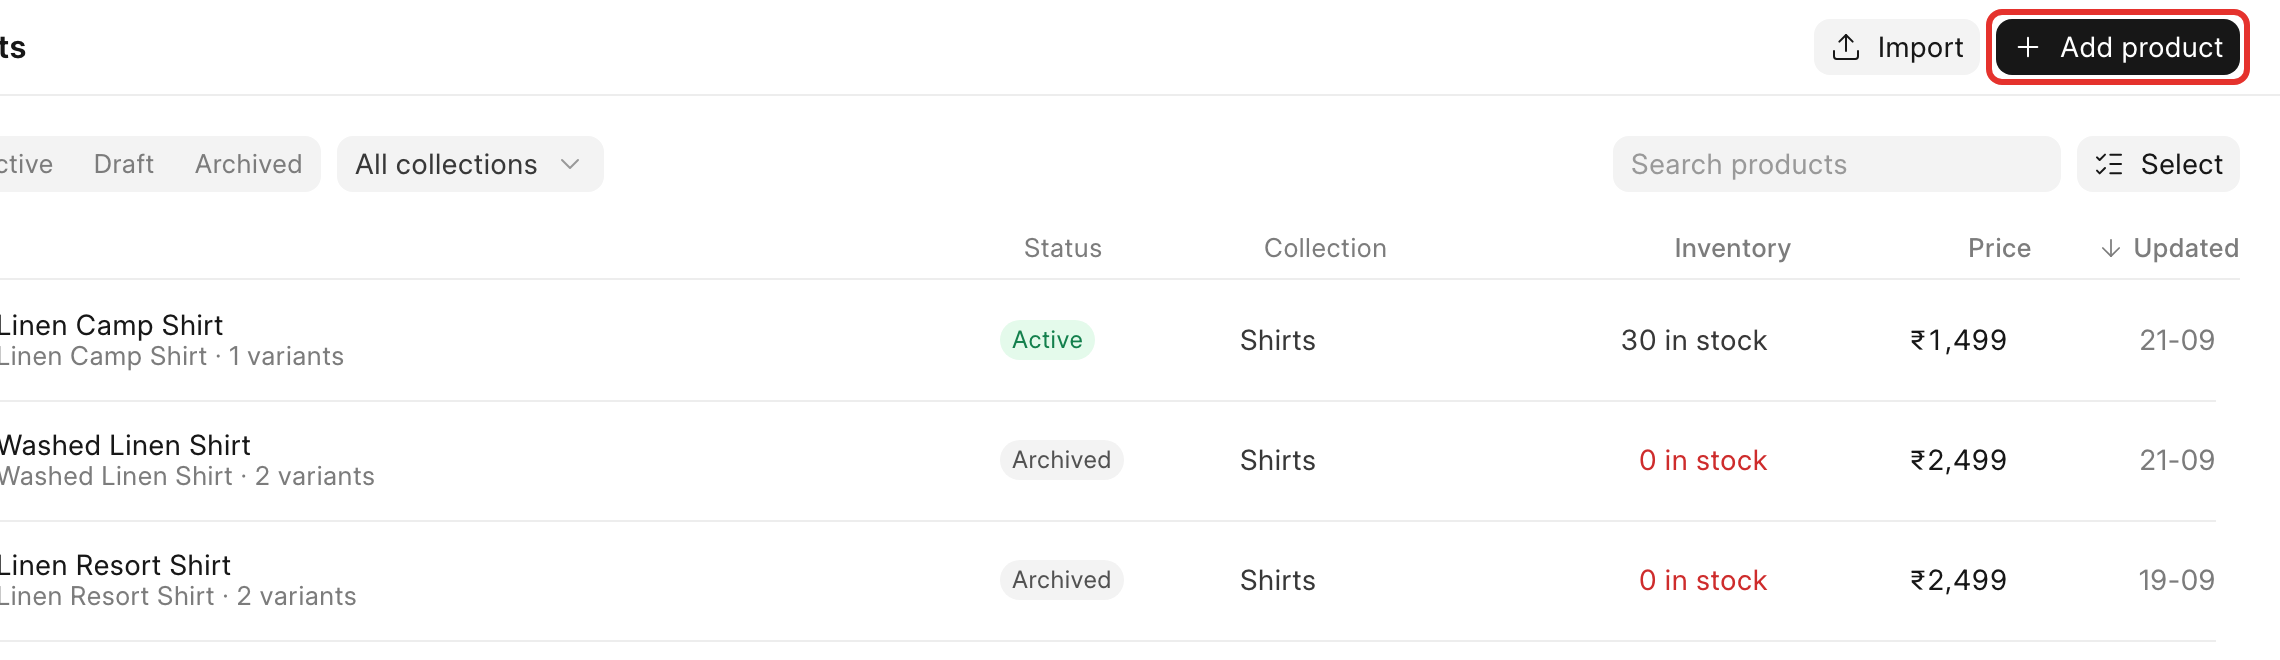
1. In the sidebar, under **Catalog**, click **Products**. Click **Add product** in the top right.
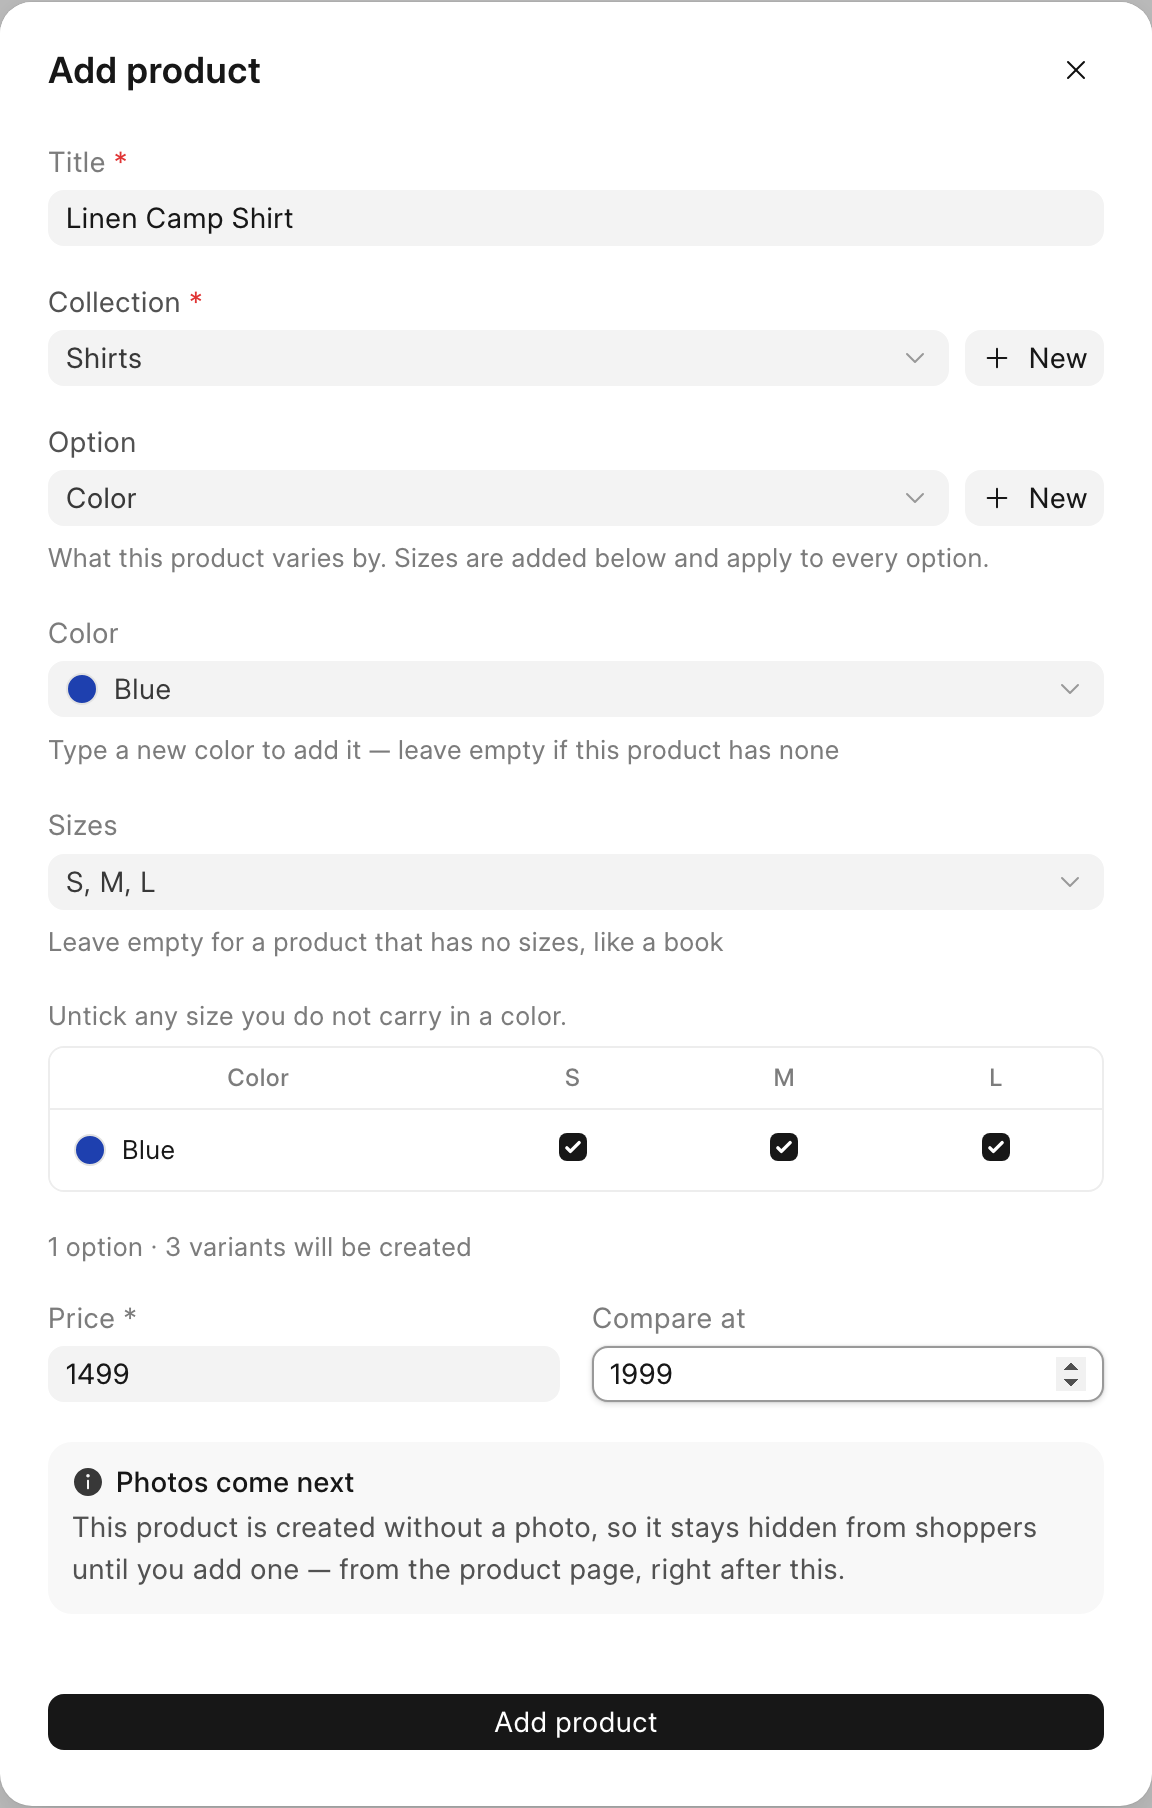
 2. The **Add product** dialog opens. Fill it in, then click **Add product** at the bottom:
1. **Title**: name the product.
2. **Collection**: pick one, or create a **New** one.
3. Under **Option**, keep the default **Color**, and pick or type a colour in the **Color** field; that becomes the first thing shoppers choose.
4. **Sizes**: list the sizes you carry.
5. Each color crossed with each size becomes one thing you can stock, price and sell, such as "Blue, size M". A grid shows every combination; untick any size you do not carry in that color.
6. **Price** and, if the item is on sale, **Compare at**, which shows shoppers a sale badge and how much they save.
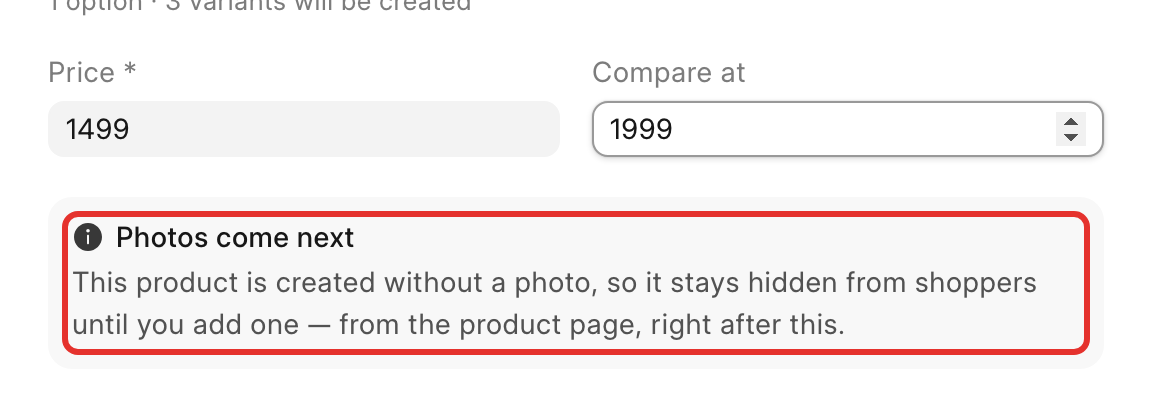
7. A note, **Photos come next**, tells you the product will be created without a photo and stays hidden from shoppers until you add one.
8. Click **Add product**.
2. The **Add product** dialog opens. Fill it in, then click **Add product** at the bottom:
1. **Title**: name the product.
2. **Collection**: pick one, or create a **New** one.
3. Under **Option**, keep the default **Color**, and pick or type a colour in the **Color** field; that becomes the first thing shoppers choose.
4. **Sizes**: list the sizes you carry.
5. Each color crossed with each size becomes one thing you can stock, price and sell, such as "Blue, size M". A grid shows every combination; untick any size you do not carry in that color.
6. **Price** and, if the item is on sale, **Compare at**, which shows shoppers a sale badge and how much they save.
7. A note, **Photos come next**, tells you the product will be created without a photo and stays hidden from shoppers until you add one.
8. Click **Add product**.
 3. Your new product's page opens. In the **Variants** table, find the color's row and click **Add** in the **Photos** column. A panel opens for that color: pick an image file to upload it.
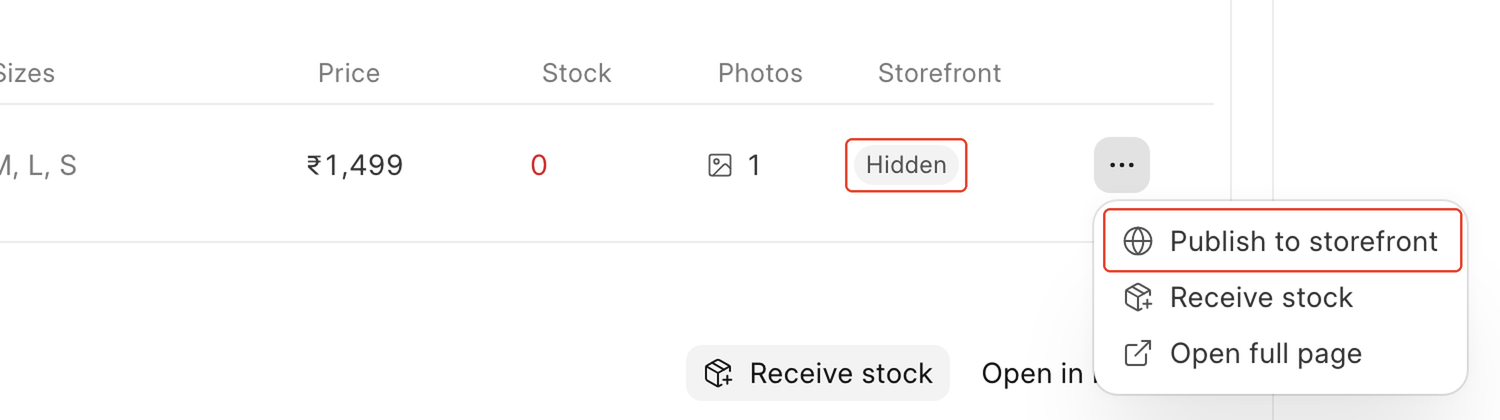
 4. Back on the variants row, click the **⋯** menu at the end of the row, then choose **Publish to storefront**.
 :::caution[A photo alone does not publish it]
Adding a photo does not make a product visible to shoppers. A color only shows on your storefront once it has a photo **and** you have chosen **Publish to storefront** for it. Do both before you expect to see it live.
:::
5. Click **Open** next to the colour in **Storefront listing** to see it as a shopper would.
## Check it worked
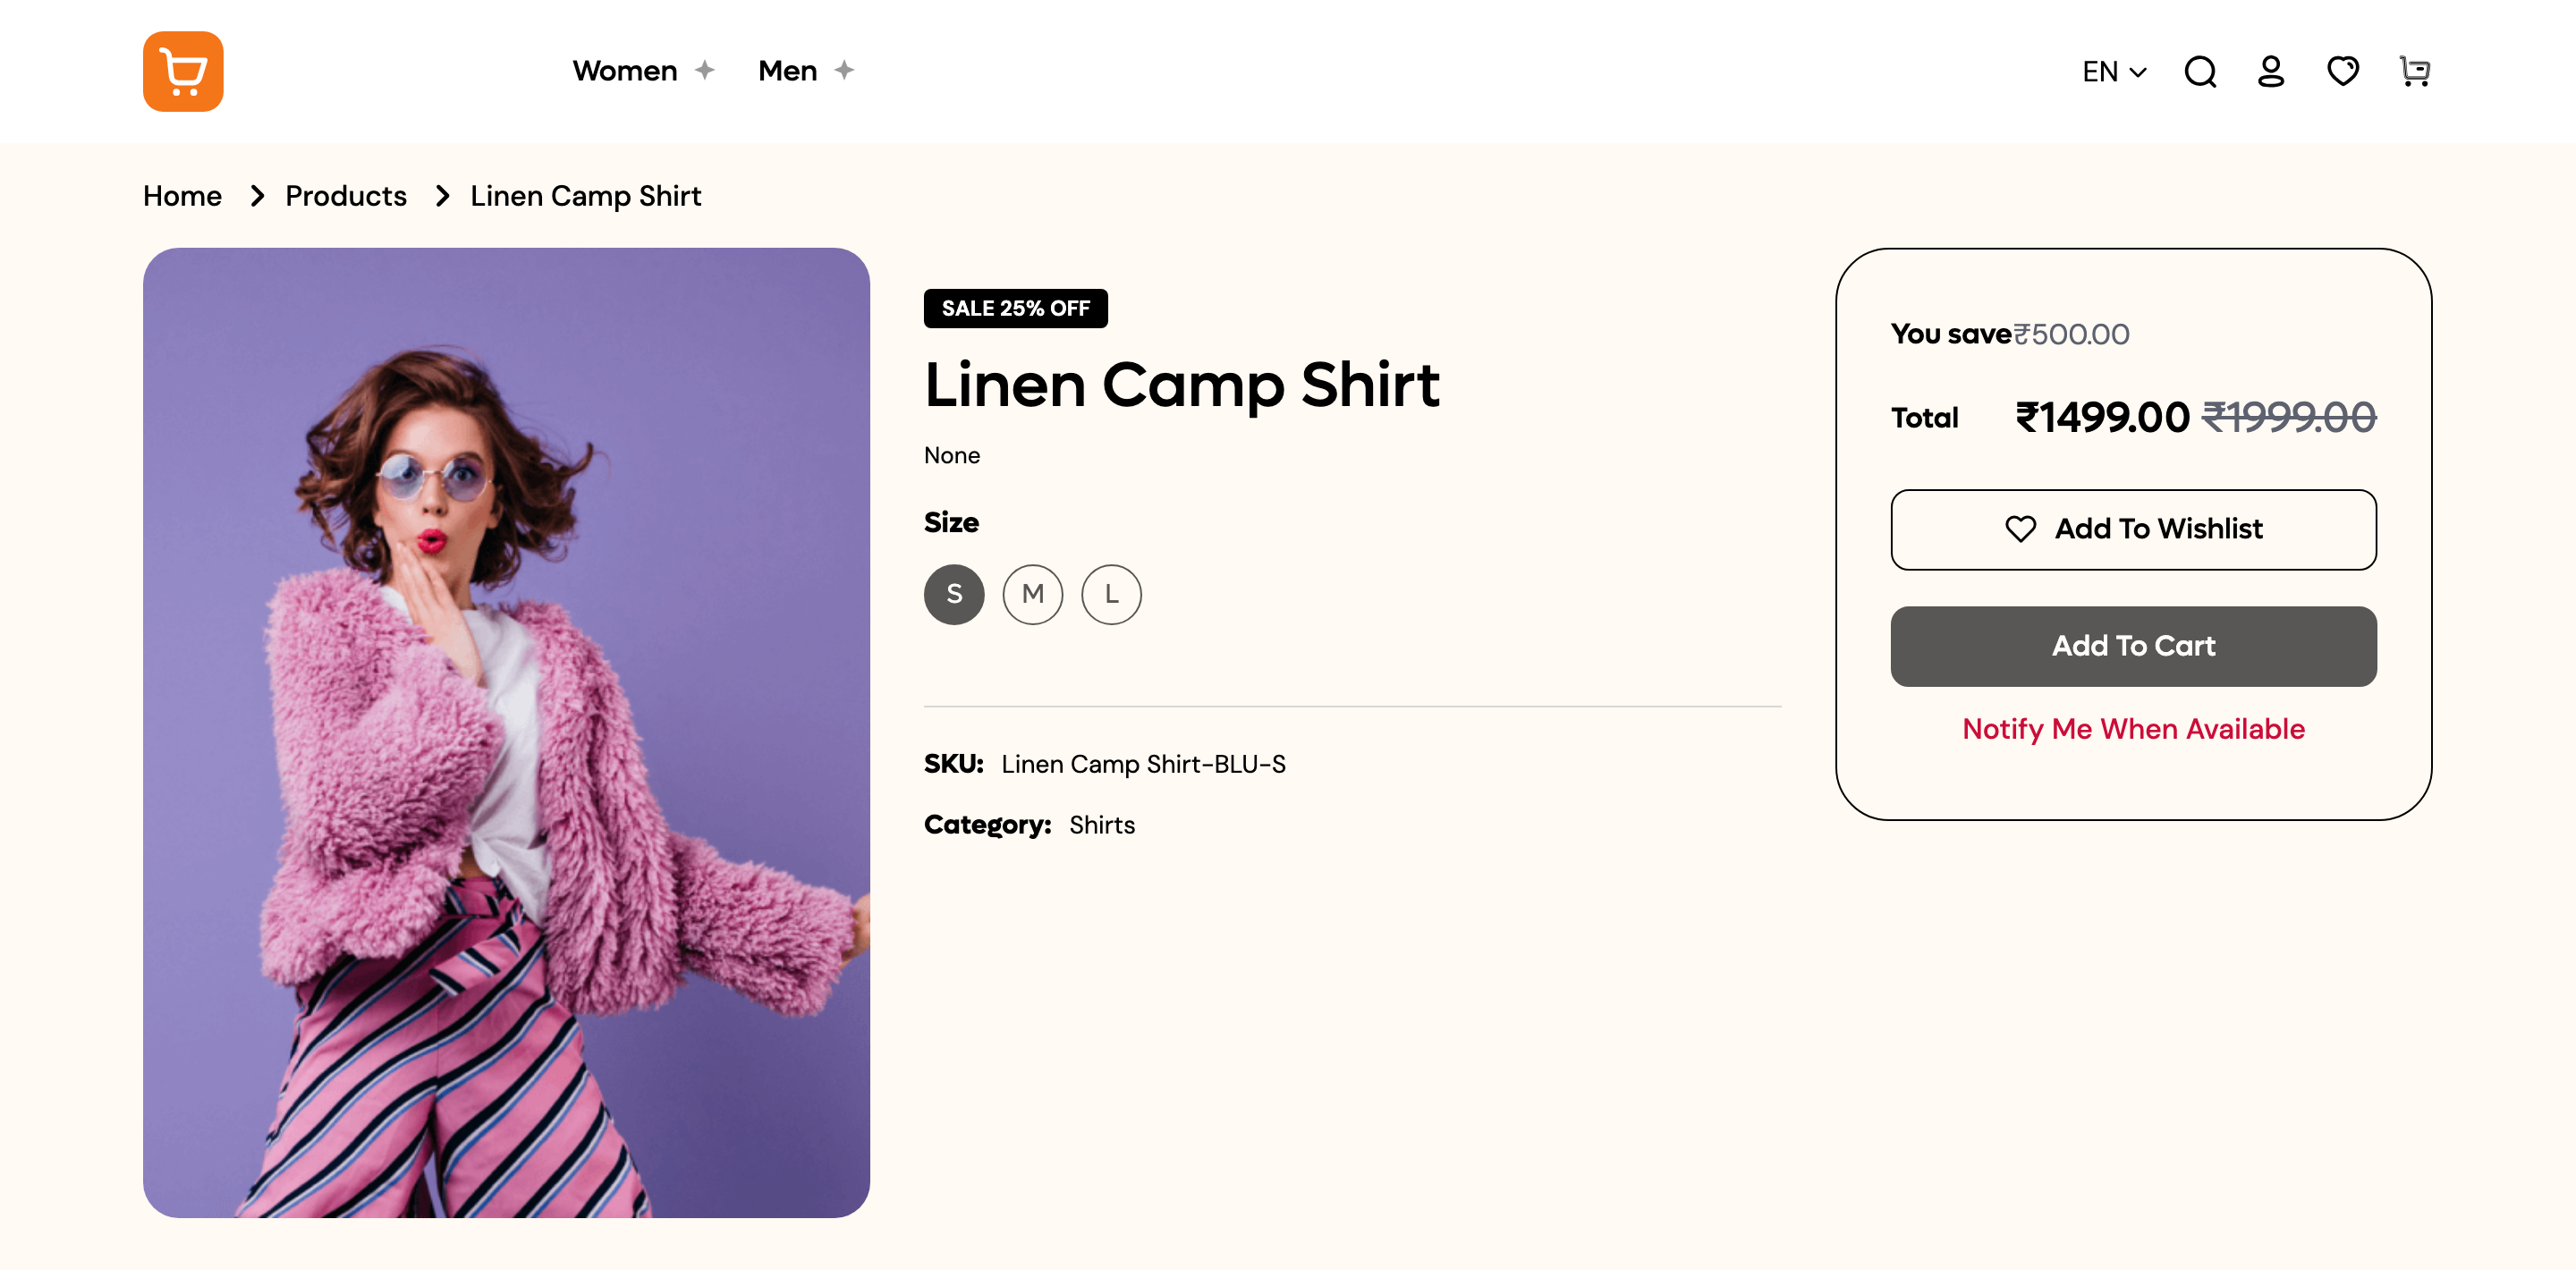
The product's storefront page shows its photo, price, and sizes. Since it has no stock yet, shoppers see both **Add To Cart** and **Notify Me When Available**; checkout itself needs stock.
:::caution[A photo alone does not publish it]
Adding a photo does not make a product visible to shoppers. A color only shows on your storefront once it has a photo **and** you have chosen **Publish to storefront** for it. Do both before you expect to see it live.
:::
5. Click **Open** next to the colour in **Storefront listing** to see it as a shopper would.
## Check it worked
The product's storefront page shows its photo, price, and sizes. Since it has no stock yet, shoppers see both **Add To Cart** and **Notify Me When Available**; checkout itself needs stock.
 ## Good to know
:::note[Photos belong to each color]
Upload photos separately for every color a product has. The first photo you add becomes that color's cover photo, the one shoppers see first.
:::
:::note[New stock starts at zero]
A freshly published product starts with no stock. Shoppers can still view it and see both **Add To Cart** and **Notify Me When Available**, but checking out needs stock, which you add with **Receive stock**, covered on a later page.
:::
:::note[Every product needs a collection]
You must place a product in a collection when you create it. If you do not have one yet, create it from the same dialog with **New**.
:::
## Next
[Connect a payment gateway](/commera/set-up-your-store/payments)
## Good to know
:::note[Photos belong to each color]
Upload photos separately for every color a product has. The first photo you add becomes that color's cover photo, the one shoppers see first.
:::
:::note[New stock starts at zero]
A freshly published product starts with no stock. Shoppers can still view it and see both **Add To Cart** and **Notify Me When Available**, but checking out needs stock, which you add with **Receive stock**, covered on a later page.
:::
:::note[Every product needs a collection]
You must place a product in a collection when you create it. If you do not have one yet, create it from the same dialog with **New**.
:::
## Next
[Connect a payment gateway](/commera/set-up-your-store/payments)