


.webp)
Create your first event
Create an event from the dashboard in one page. You need to be an Owner, Admin or Manager on your team.
Steps
- On the Events page, click Create Event in the top-right corner.
- Click Name your event and type the event's name.
- Optional: click Add a banner and upload a wide image. A 3:1 image, such as 1500×500 or 900×300 pixels, works best. Adjust the crop and click Save.
- Optional: under About, describe the event. The editor supports headings, lists, links and images.
- Set the start date and time, the end time, and the time zone. For a multi-day event, also set an end date.
- Under Where, click Add Location:
- Search for a venue or place and pick it from the results, or
- Click Add manually to enter a name, address and map link, or
- Choose Zoom meeting to run the event online. Buzz books the meeting when you save.
- Check the Still needed list at the bottom. When it changes to Ready to create, click Create.
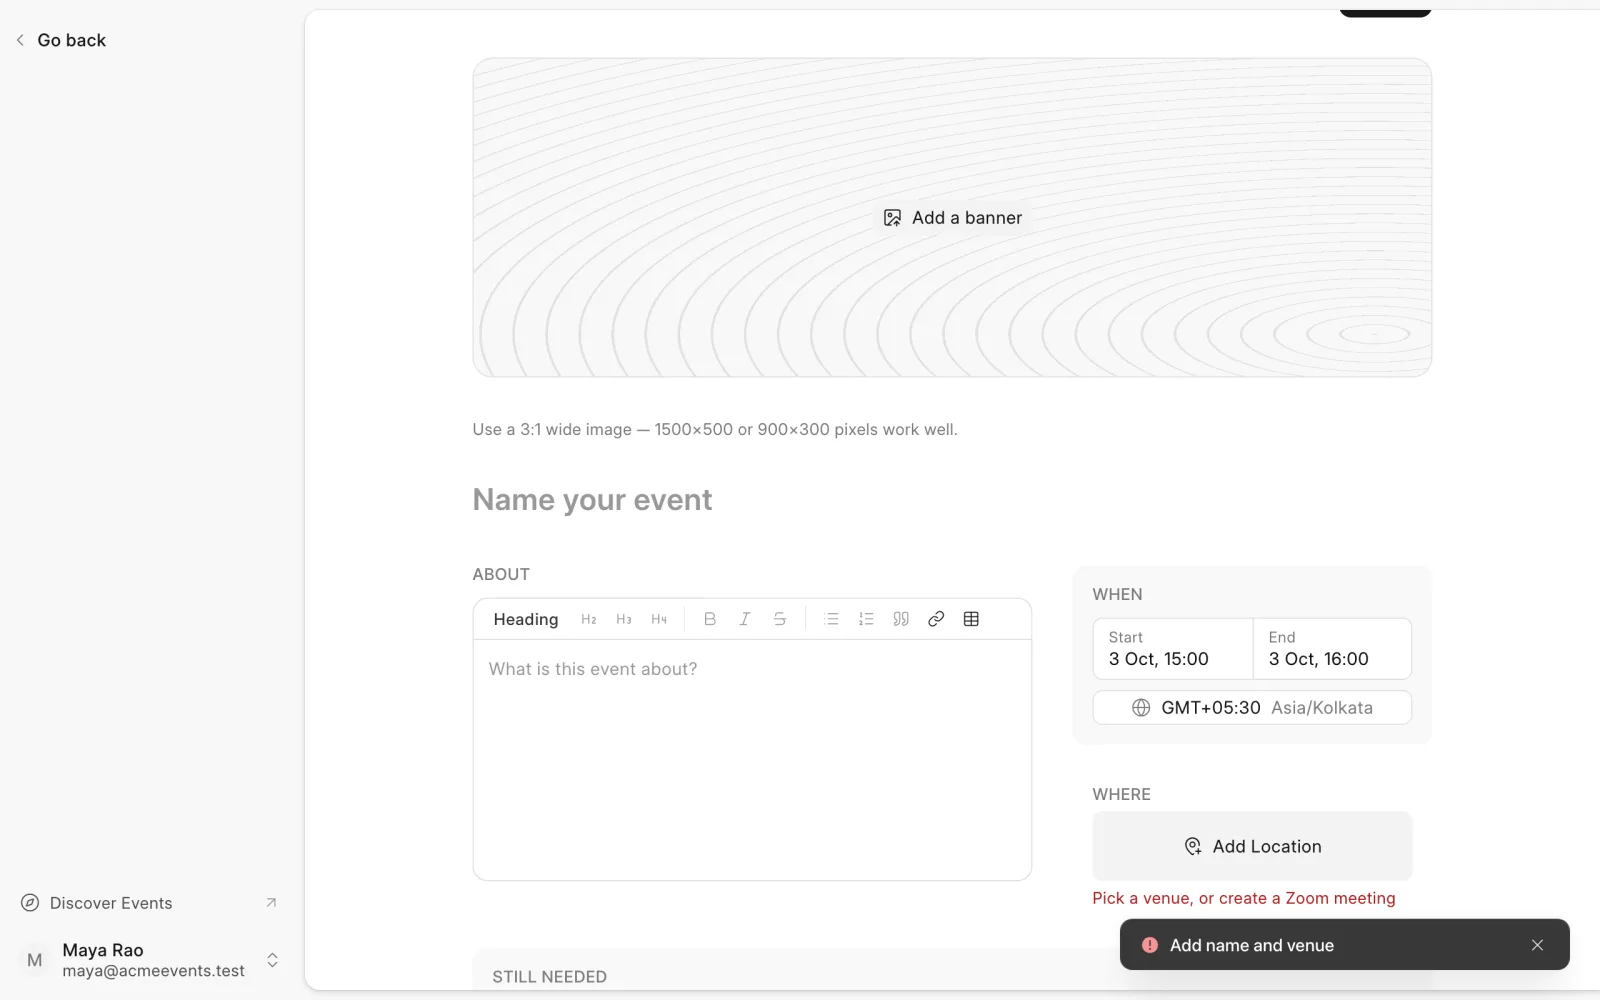
Buzz opens the new event on its Details page.
What happens when you create an event
- The event page goes live straight away at
/events/<event-route>. - It comes with a free ticket type and a sponsorship tier, both called Normal. Edit or disable them on the Registration and Sponsorships pages.
- Registrations start closed, so nobody can book before your tickets and details are ready. Open them from the Registration page when you're ready.
If something is missing
Clicking Create with an empty required field points you to it. The required fields are the name, start date and time, end time, and a location. The end must also come after the start.
Last updated 1 week ago
Was this helpful?