.webp)





Write three new sections: a sale banner, some offer tiles and a row of sale products. Then put them on the home page.
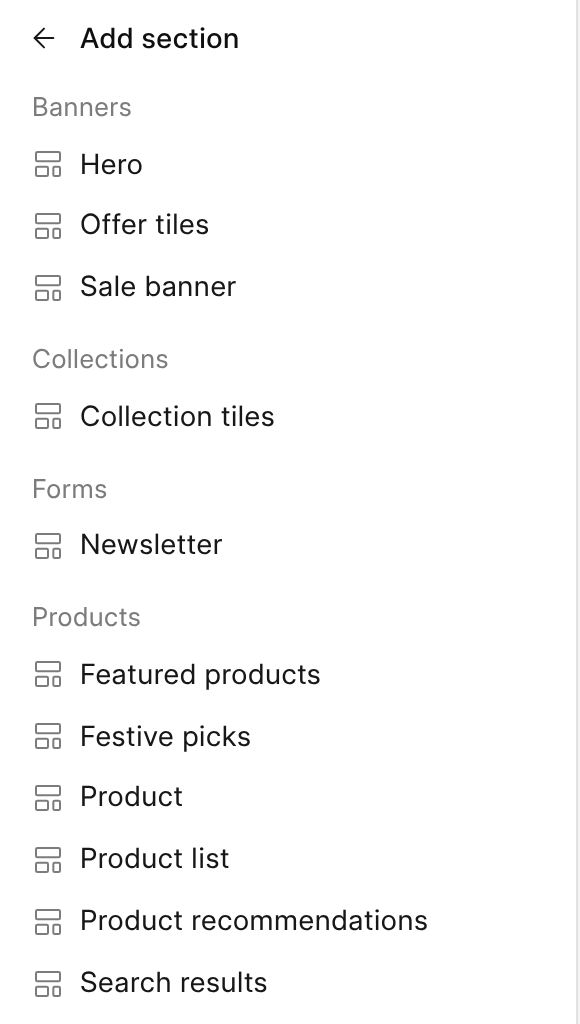
By the end, the home page has the three sections, and a merchant finds them in the editor under Add section.
Before you start
Finish Change a section.
What is a setting, what is a block, what is fixed
Before you write a section, decide who changes what. A section has three kinds of thing.
| Make it | When | Example |
|---|---|---|
| A setting | One value, which the merchant may want to change | The heading of the sale banner |
| A block | A thing that repeats, where the merchant adds, removes and reorders copies | An offer in the sale banner |
Fixed in the .html |
The merchant should not change it, or the design breaks | Spacing, the grid, font sizes, the shape of a card |
A good test is to ask "what would the client ask me to change before Diwali?" It is the words, the photos and the number of offers. It is not the padding.
Two more things help:
- Give every setting a
defaultthat looks good, so the section looks right the moment it is added. - Use the theme's colours (
bg-brand,text-on-brand) and not fixed ones. The section then follows the colour the client picks in Theme settings.
Sale banner
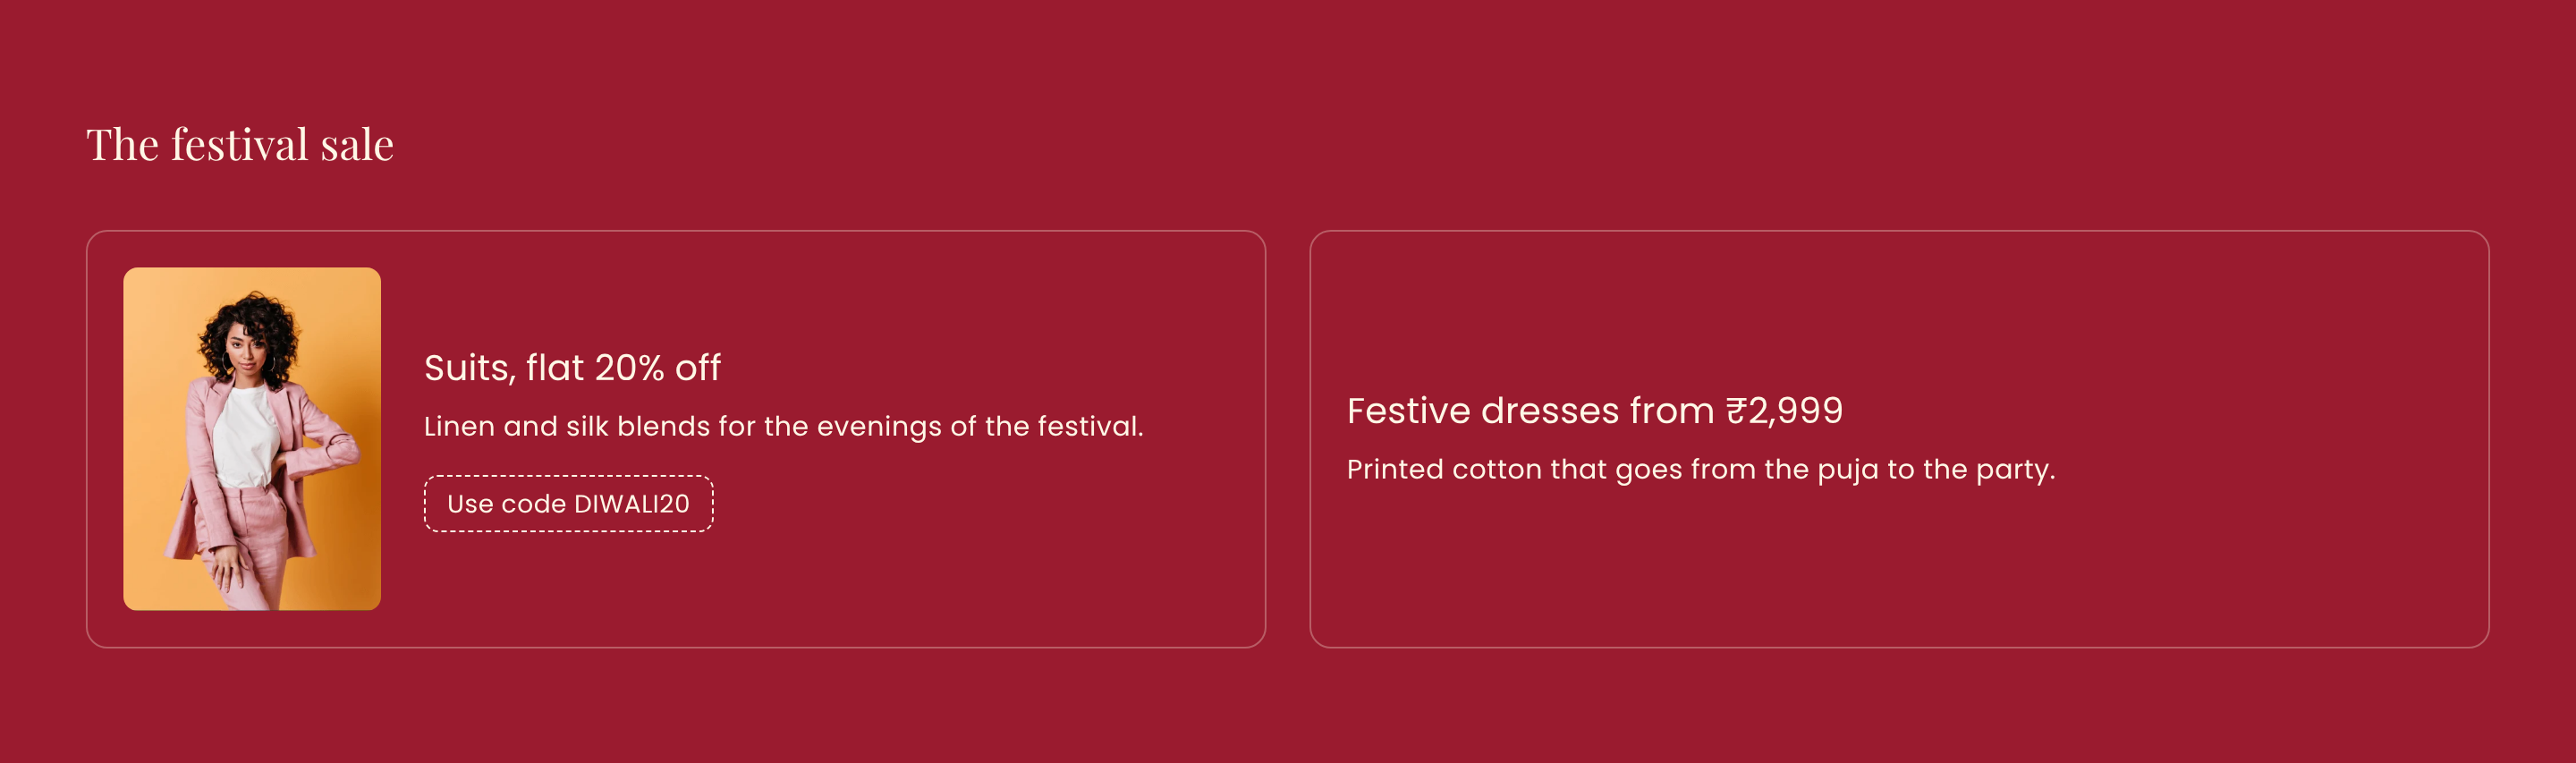
A banner with a heading and up to three offers. The heading is a setting. Each offer is a block, with a photo, a title, some text, a discount code and a link.
-
Make
themes/diwali/sections/sale_banner.json:{ "name": "Sale banner", "category": "Banners", "settings": [ { "id": "heading", "type": "text", "label": "Heading", "default": "The festival sale" } ], "blocks": { "offer": { "name": "Offer", "settings": [ { "id": "image", "type": "image", "label": "Image", "default": "" }, { "id": "title", "type": "text", "label": "Title", "default": "Flat 20% off" }, { "id": "text", "type": "textarea", "label": "Text", "default": "" }, { "id": "code", "type": "text", "label": "Discount code", "default": "" }, { "id": "url", "type": "url", "label": "Link", "default": "" } ] } }, "max_blocks": 3 }nameis what the merchant sees.categoryis the group it sits in under Add section.blockslists the kinds of block. The key,offer, is the block type.max_blocksis the most offers the merchant can add.
-
Make
themes/diwali/sections/sale_banner.html:{% set language = frappe.lang or "en" %} {% if section.blocks %} <section class="bg-brand px-5 py-16 text-on-brand md:px-12"> <h2 class="text-4xl">{{ section.settings.heading }}</h2> <div class="mt-8 grid gap-6 grid-cols-[repeat(auto-fit,minmax(20rem,1fr))]"> {% for offer in section.blocks %} <a href="{{ offer.settings.url or '/' ~ language ~ '/products' }}" class="flex flex-col items-start gap-6 rounded-xl border border-on-brand/30 p-5 sm:flex-row sm:items-center"{{ offer.editor_attributes }}> {% if offer.settings.image %} <img src="{{ offer.settings.image }}" alt="{{ offer.settings.title }}" loading="lazy" class="aspect-[3/4] w-36 shrink-0 rounded-lg object-cover"> {% endif %} <div> <p class="text-3xl">{{ offer.settings.title }}</p> {% if offer.settings.text %} <p class="mt-2 text-p-md">{{ offer.settings.text }}</p> {% endif %} {% if offer.settings.code %} <p class="mt-4 inline-flex h-8 items-center whitespace-nowrap rounded-lg border border-dashed border-on-brand px-3 text-base">{{ _("Use code {0}").format(offer.settings.code) }}</p> {% endif %} </div> </a> {% endfor %} </div> </section> {% endif %}section.settings.headingis the setting.section.blocksis the list of offers.offer.settings.imageis a ready image URL. You do not have to build it.{{ offer.editor_attributes }}lets the editor select the offer when the merchant clicks it in the preview. Put it on the outer tag of every block. It prints nothing on the live store.- The section prints nothing if it has no offers.
Offer tiles
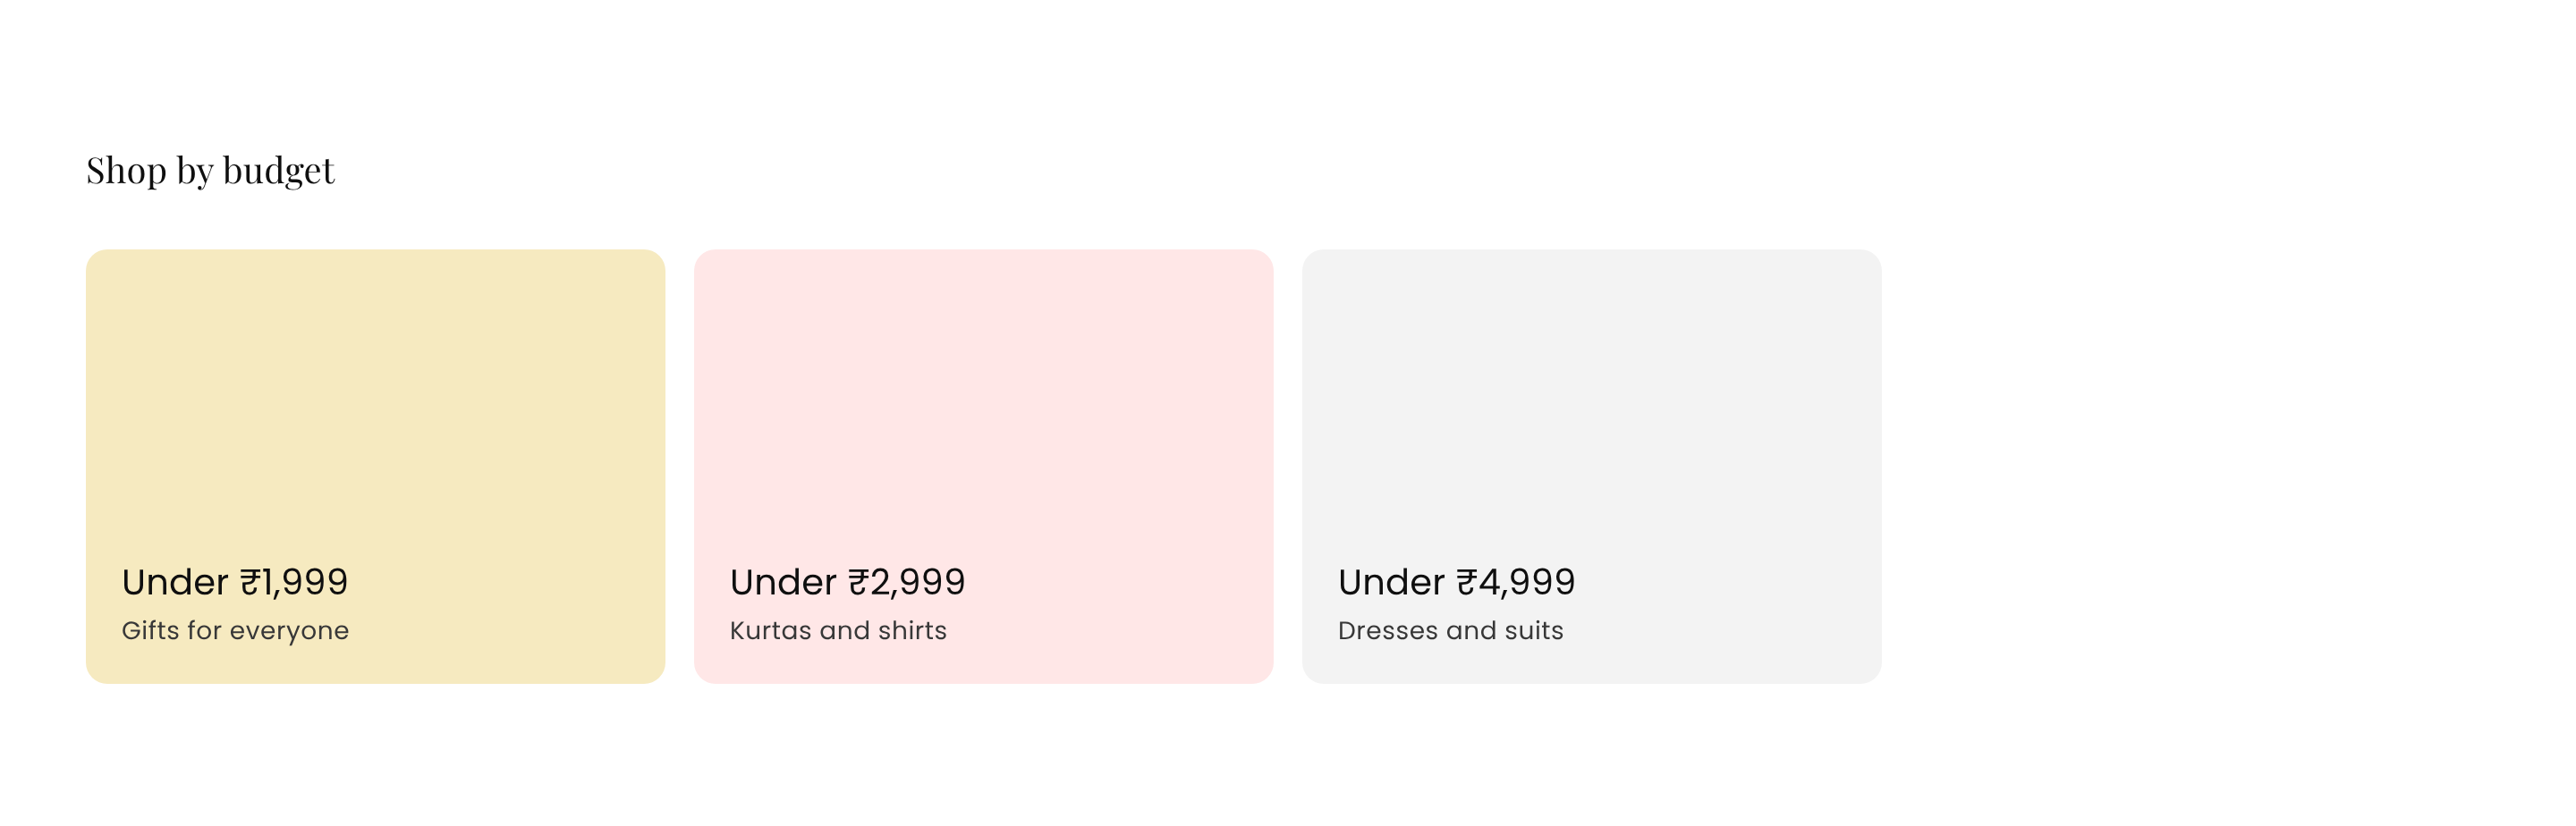
A row of tiles for price bands, such as "Under ₹1,999". Each tile is a block. The colour of a tile is a select, so the merchant picks from your list.
-
Make
themes/diwali/sections/offer_tiles.json:{ "name": "Offer tiles", "category": "Banners", "settings": [ { "id": "heading", "type": "text", "label": "Heading", "default": "Shop by budget" } ], "blocks": { "tile": { "name": "Tile", "settings": [ { "id": "label", "type": "text", "label": "Label", "default": "Under ₹1,999" }, { "id": "caption", "type": "text", "label": "Caption", "default": "" }, { "id": "url", "type": "url", "label": "Link", "default": "" }, { "id": "tone", "type": "select", "label": "Colour", "options": ["warm", "blush", "plain"], "default": "warm" } ] } }, "max_blocks": 4 } -
Make
themes/diwali/sections/offer_tiles.html:{% set language = frappe.lang or "en" %} {% set tones = {"warm": "bg-surface-amber-3", "blush": "bg-surface-red-2", "plain": "bg-surface-gray-2"} %} {% if section.blocks %} <section class="px-5 py-20 md:px-12"> <h2 class="text-3xl">{{ section.settings.heading }}</h2> <div class="mt-8 grid grid-cols-2 gap-4 md:grid-cols-4"> {% for tile in section.blocks %} <a href="{{ tile.settings.url or '/' ~ language ~ '/products' }}" class="{{ tones[tile.settings.tone] }} flex aspect-[4/3] flex-col justify-end rounded-xl p-5"{{ tile.editor_attributes }}> <p class="text-3xl">{{ tile.settings.label }}</p> {% if tile.settings.caption %} <p class="mt-1 text-base text-ink-gray-7">{{ tile.settings.caption }}</p> {% endif %} </a> {% endfor %} </div> </section> {% endif %}The
tonesline is the same idea as the hero'sbackgrounds: each option maps to a class that is written out in full.
Festive picks
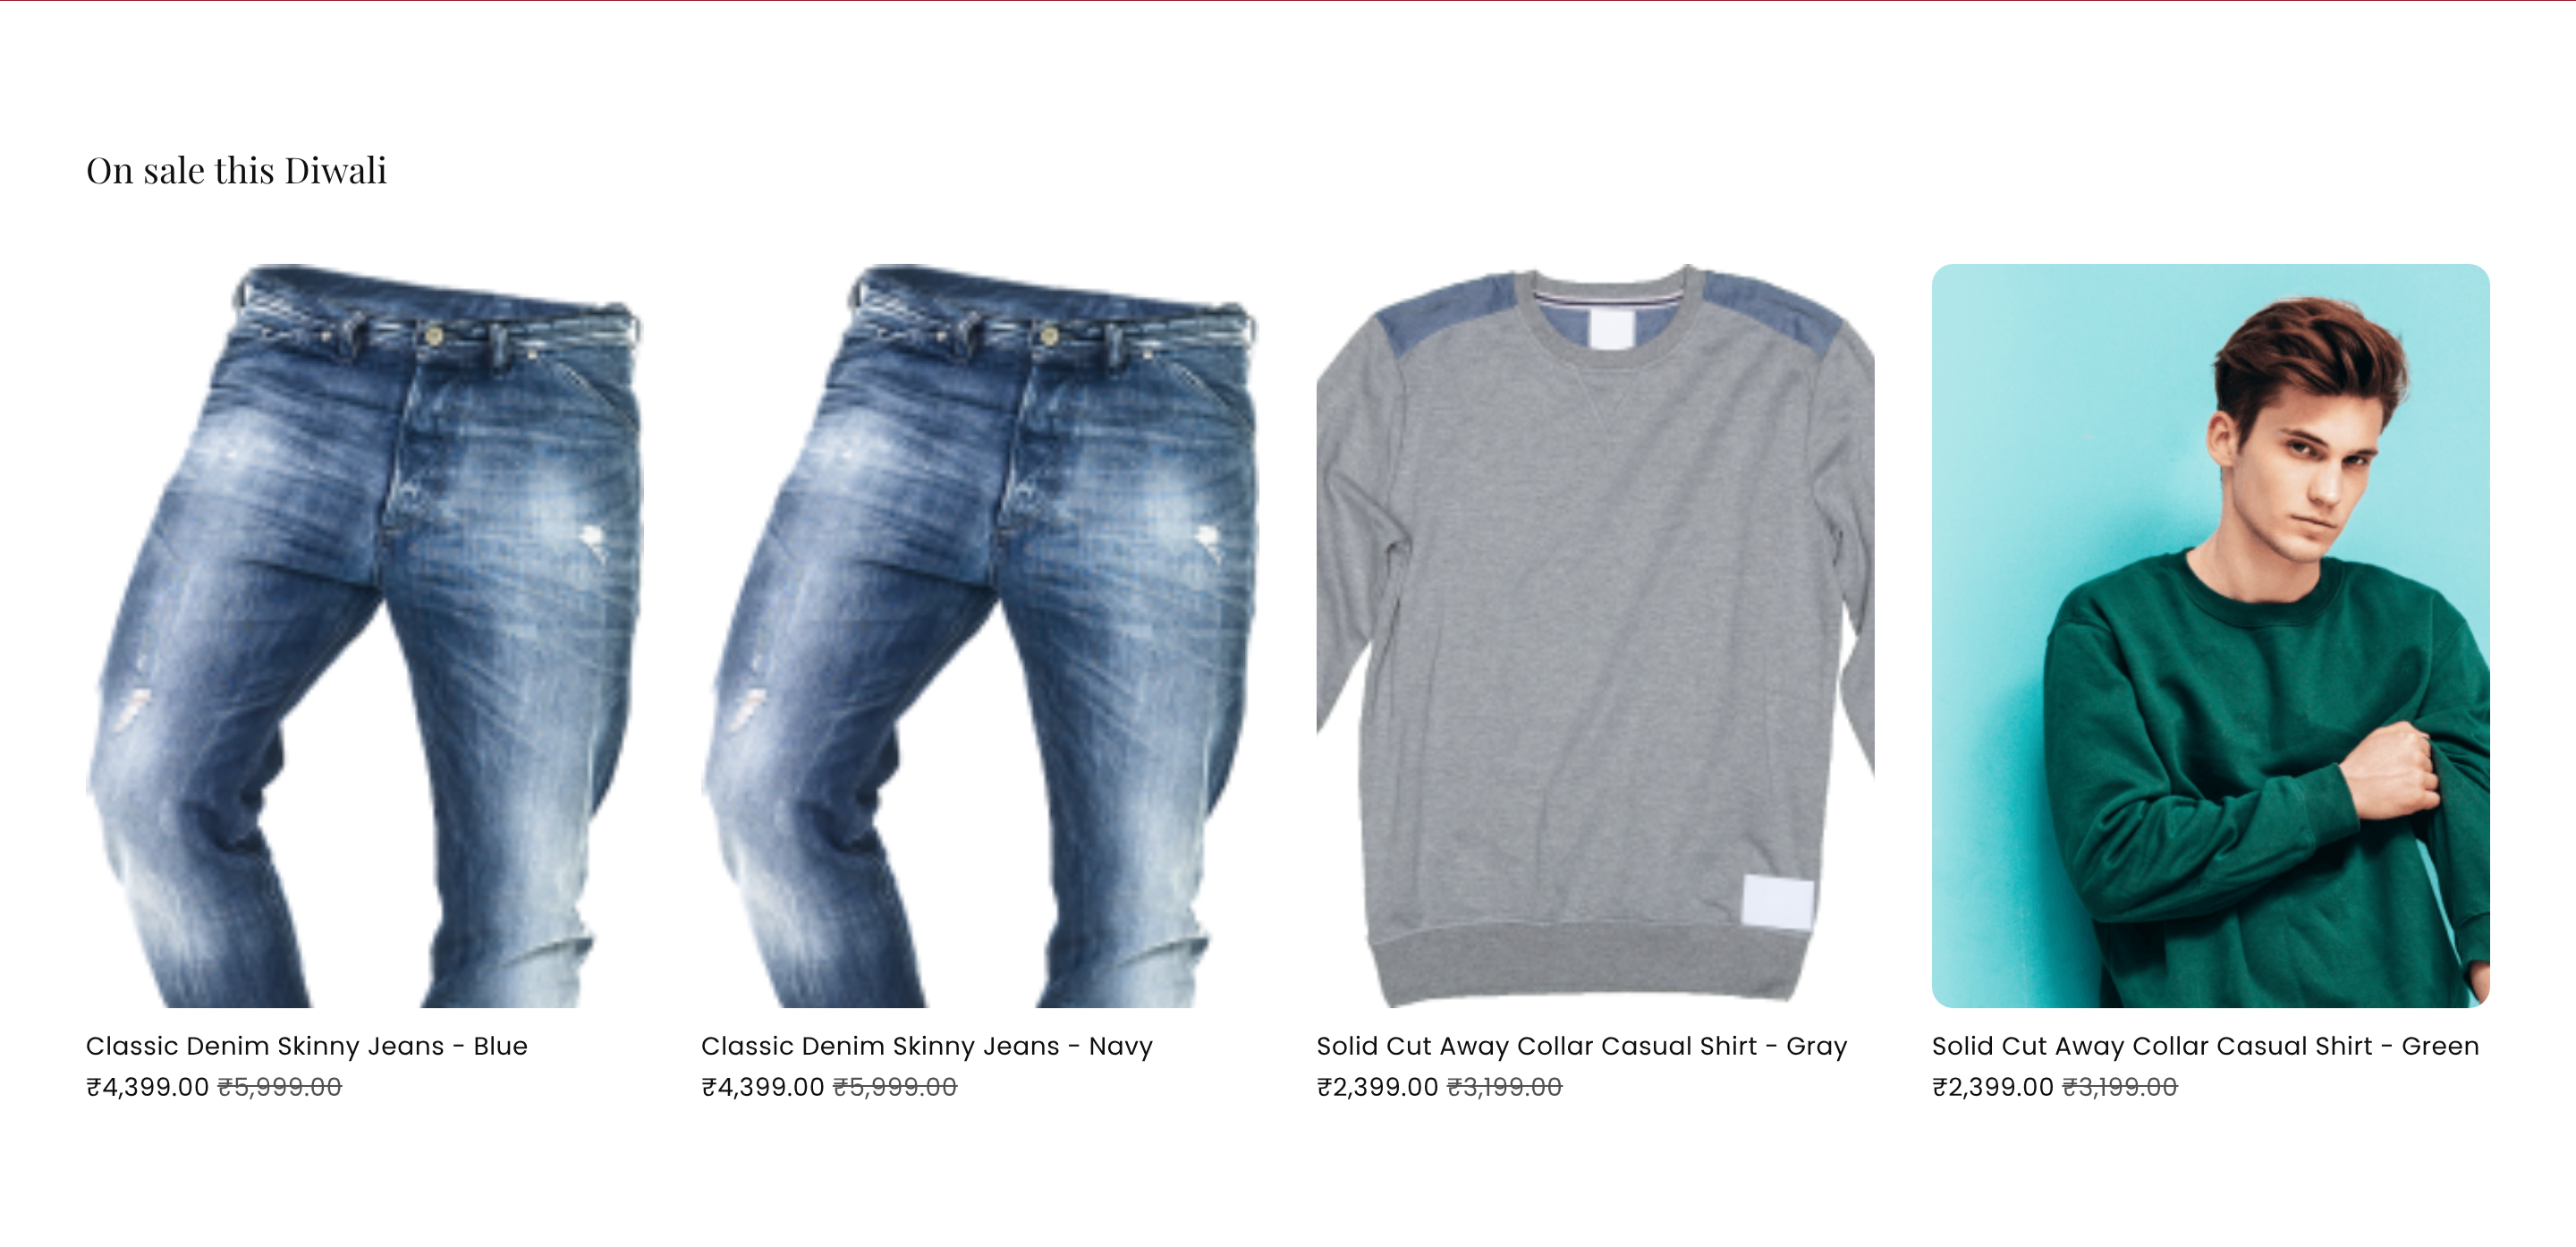
A row of products that are on sale. The merchant does not pick the products. The theme asks the store, so the row always shows what is on sale today.
Templates get a commera object. commera.catalog.list_products returns a page of products, in the same shape the shop pages use.
-
Make
themes/diwali/sections/festive_picks.json:{ "name": "Festive picks", "category": "Products", "settings": [ { "id": "title", "type": "text", "label": "Title", "default": "On sale this Diwali" }, { "id": "count", "type": "number", "label": "Products to show", "default": 4 } ], "blocks": {}, "max_blocks": 0 } -
Make
themes/diwali/sections/festive_picks.html:{% from "components/macros/product_card.html" import product_card with context %} {% set products = commera.catalog.list_products(on_sale=True, sort="discount", page_size=section.settings.count | int).products %} {% if products %} <section class="px-5 py-20 md:px-12"> <h2 class="text-3xl">{{ section.settings.title }}</h2> <div class="mt-10 grid grid-cols-2 gap-x-5 gap-y-12 md:grid-cols-4 md:gap-x-8"> {% for product in products %} {{ product_card(product) }} {% endfor %} </div> </section> {% endif %}on_sale=Truekeeps the products that have a sale price.sort="discount"puts the biggest discounts first.- A
numbersetting gives a float, so| intturns it into a whole number forpage_size. product_cardis the same macro the starter's product lists use.- If no product is on sale, the section prints nothing.
Put them on the home page
A section file says how a section works. A layout says where it goes. Open themes/diwali/layouts/index.json and add three entries to the sections list, after the hero:
	{
		"id": "festival-sale",
		"type": "sale_banner",
		"hidden": false,
		"settings": { "heading": "The festival sale" },
		"blocks": [
			{
				"id": "offer-1",
				"type": "offer",
				"settings": {
					"image": "images/suit.webp",
					"title": "Suits, flat 20% off",
					"text": "Linen and silk blends for the evenings of the festival.",
					"code": "DIWALI20"
				}
			},
			{
				"id": "offer-2",
				"type": "offer",
				"settings": {
					"title": "Festive dresses from ₹2,999",
					"text": "Printed cotton that goes from the puja to the party."
				}
			}
		]
	},
	{
		"id": "festive-picks",
		"type": "festive_picks",
		"hidden": false,
		"settings": {},
		"blocks": []
	},
	{
		"id": "budget",
		"type": "offer_tiles",
		"hidden": false,
		"settings": {},
		"blocks": [
			{ "id": "tile-1", "type": "tile", "settings": { "label": "Under ₹1,999", "caption": "Gifts for everyone", "tone": "warm" } },
			{ "id": "tile-2", "type": "tile", "settings": { "label": "Under ₹2,999", "caption": "Kurtas and shirts", "tone": "blush" } },
			{ "id": "tile-3", "type": "tile", "settings": { "label": "Under ₹4,999", "caption": "Dresses and suits", "tone": "plain" } }
		]
	}
typeis the file name of the section.idis the name of this copy. It must be different from the other ids on the page.settingsandblockshold the values for this page. A setting you leave out uses itsdefault.- The second offer has no photo. The client adds it later.
Build the CSS, because the new sections use classes the theme did not have:
npm run build:diwali
Check it worked
Open /en. The three sections are on the home page.
On a phone, the offers stack, and the image goes above the words:
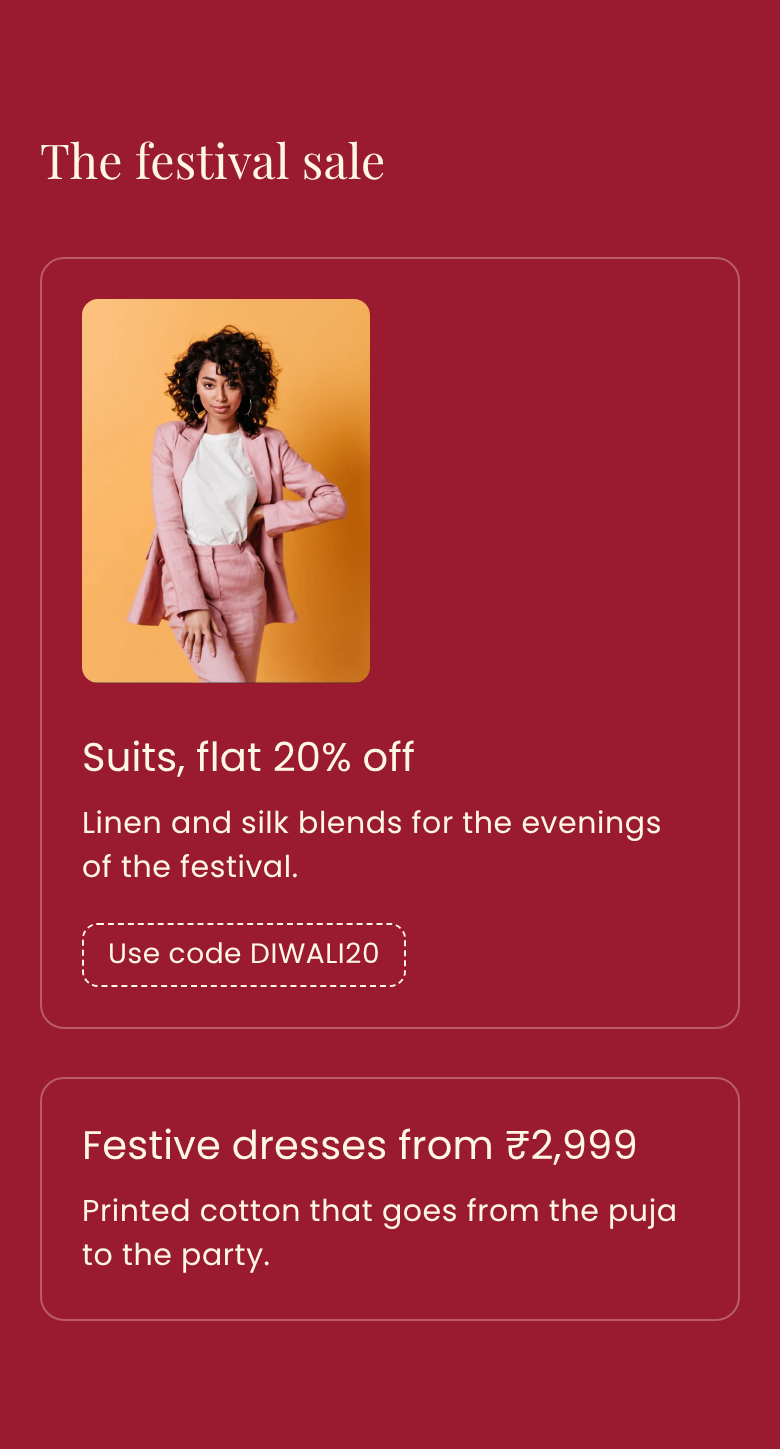
Now open the theme editor, at /commera/storefront/theme/Diwali/editor. Click the + next to Home page. The new sections are in the list. Sale banner and Offer tiles are under Banners, and Festive picks is under Products, because of each file's category.