.webp)





Hand it to your client
Every setting in your .json files is a field in the theme editor. This page shows what your client sees, so you know what to tell them.
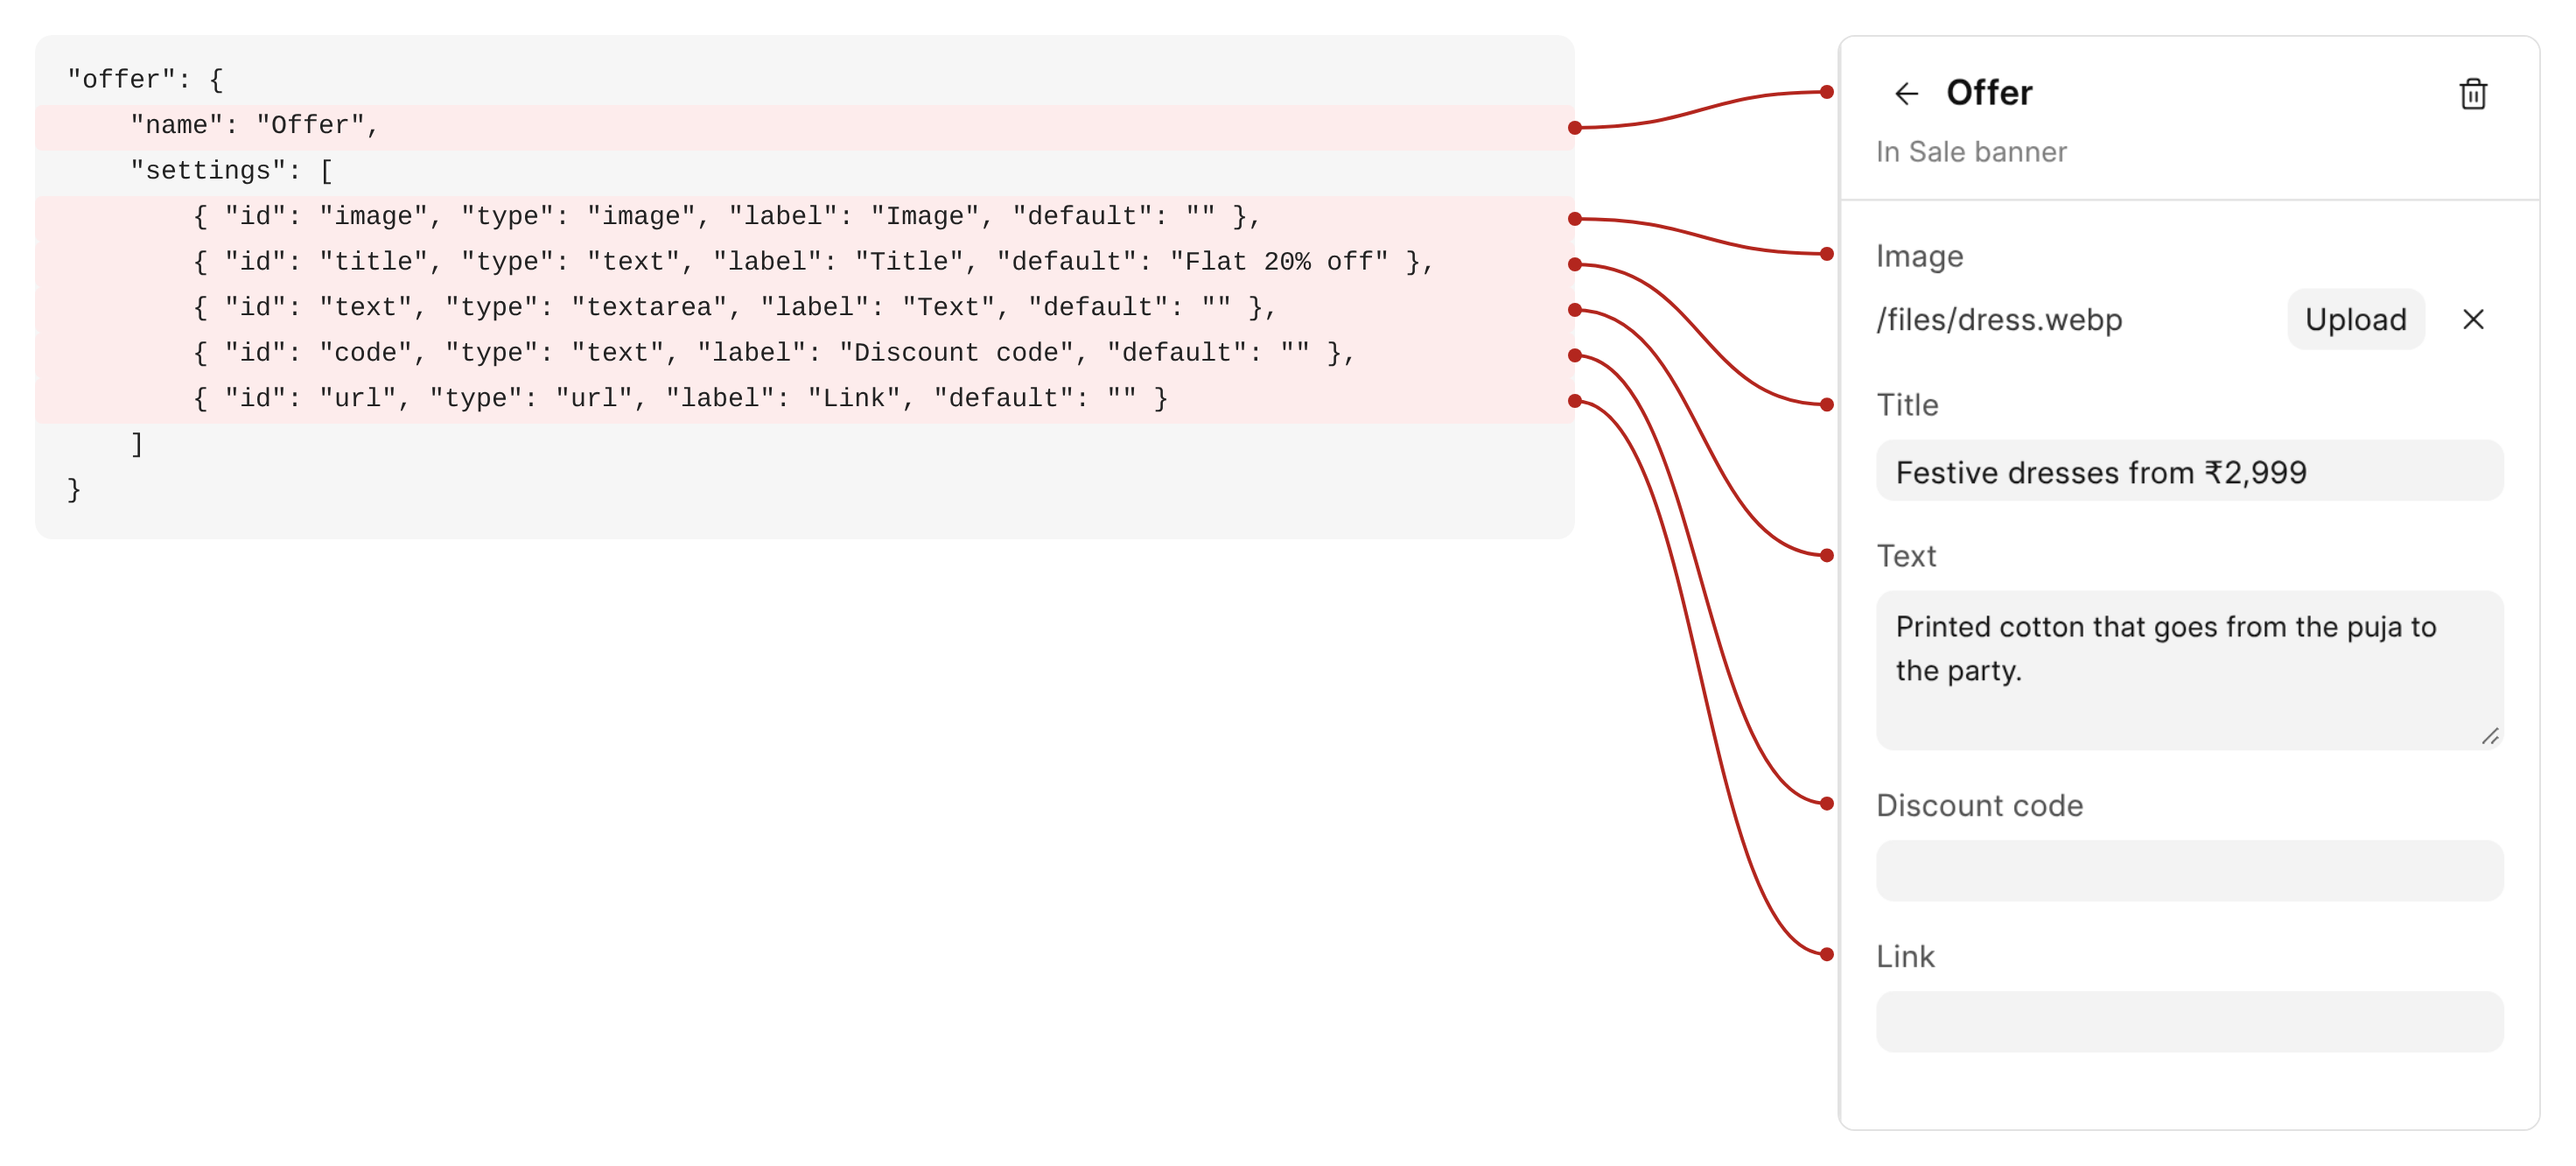
On the left is the offer block from sale_banner.json. On the right is the form the editor makes from it.
nameis the heading of the form.- Each setting is one field.
labelis the name above it, andtypesays what kind of field it is:imagemakes an Upload button,textareamakes a box for a few lines, andtextandurlmake one line. - The
defaultis what the field holds until the merchant types something else.
You wrote no form code. Add a setting to the file and the field is there when you reload the editor.
What your client does
Your client needs a login to /commera. Then:
-
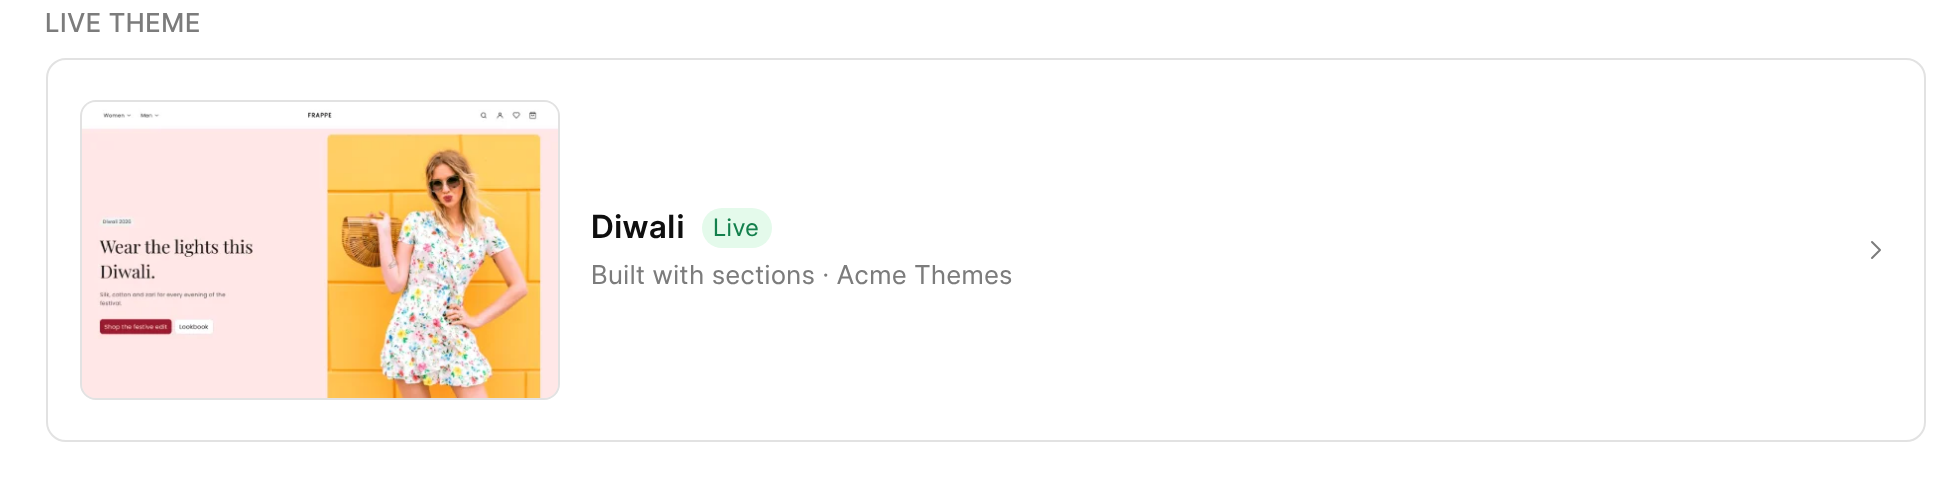
Open Storefront, then Themes, and click Diwali.
-
Add a section. Click + next to Home page. Your sections are in the list, in the groups you gave them with
category.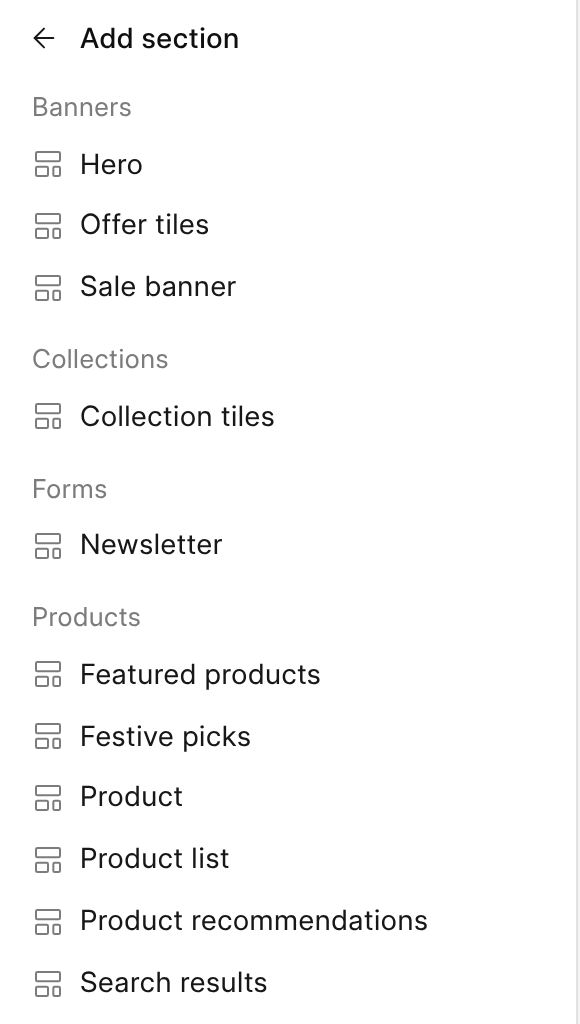
-
Change the words. Click Hero in the list on the left. The form on the right has the fields from
hero.json. The preview changes as they type. The Background drop-down is theselectyou made.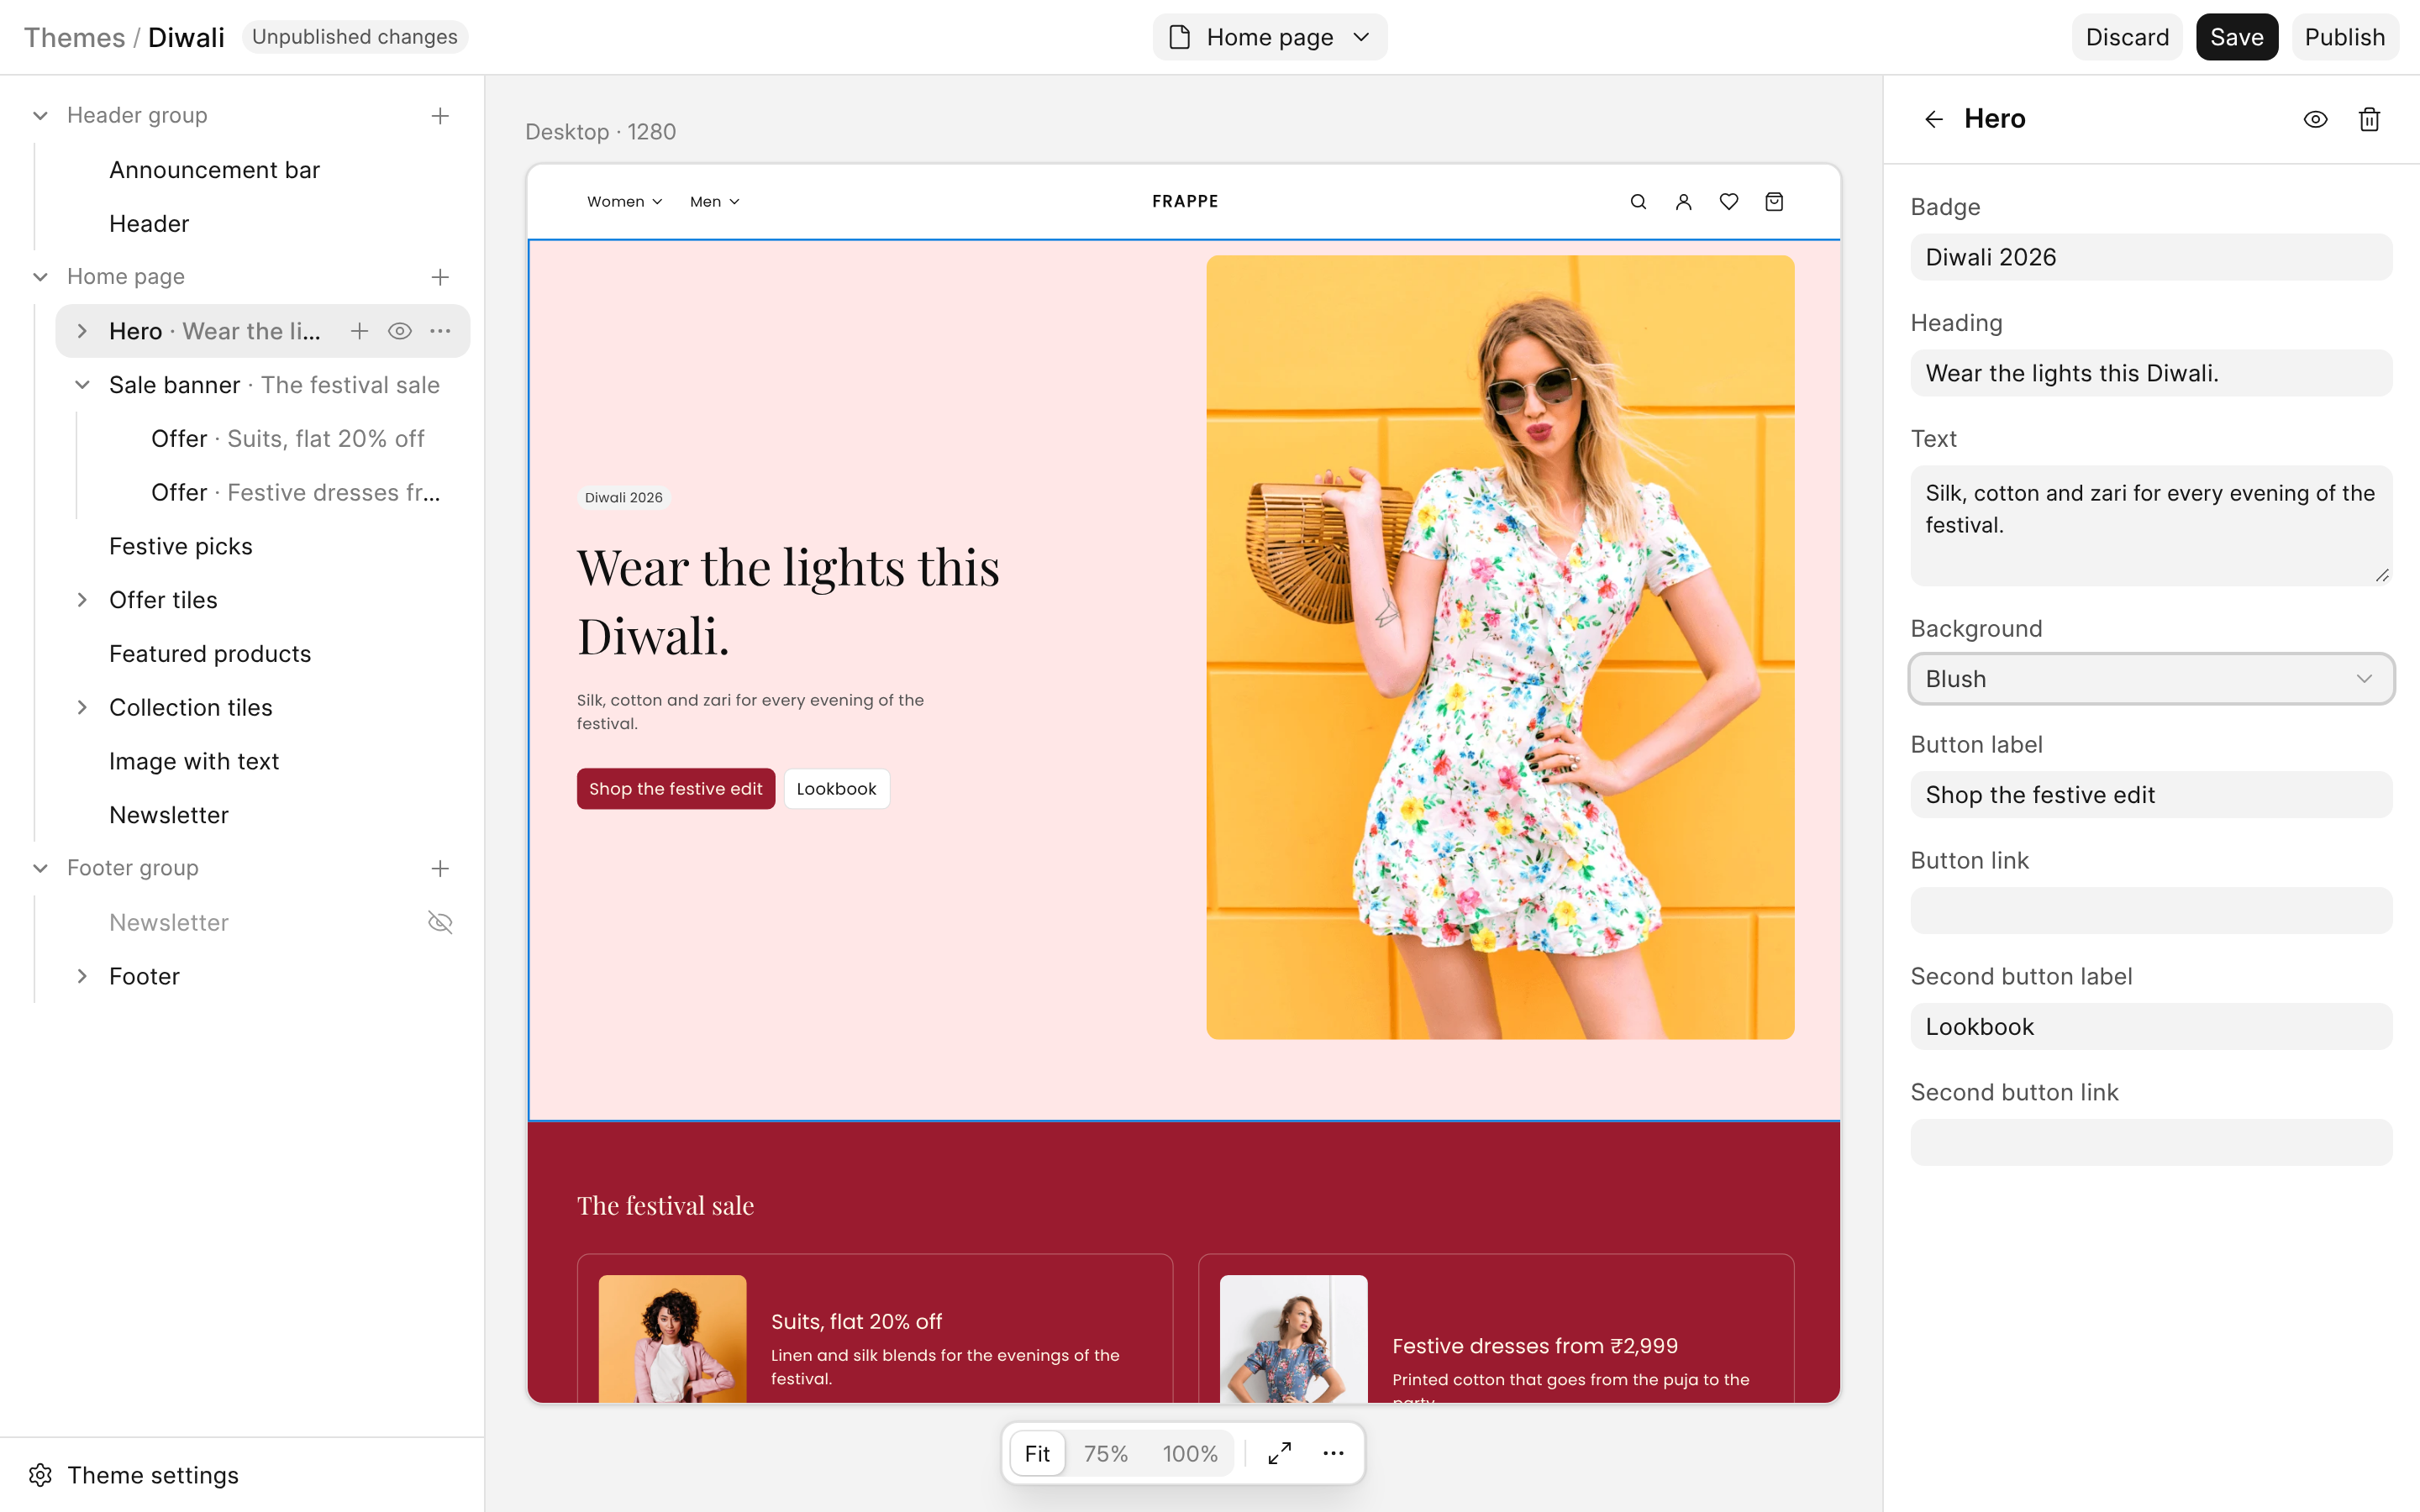
-
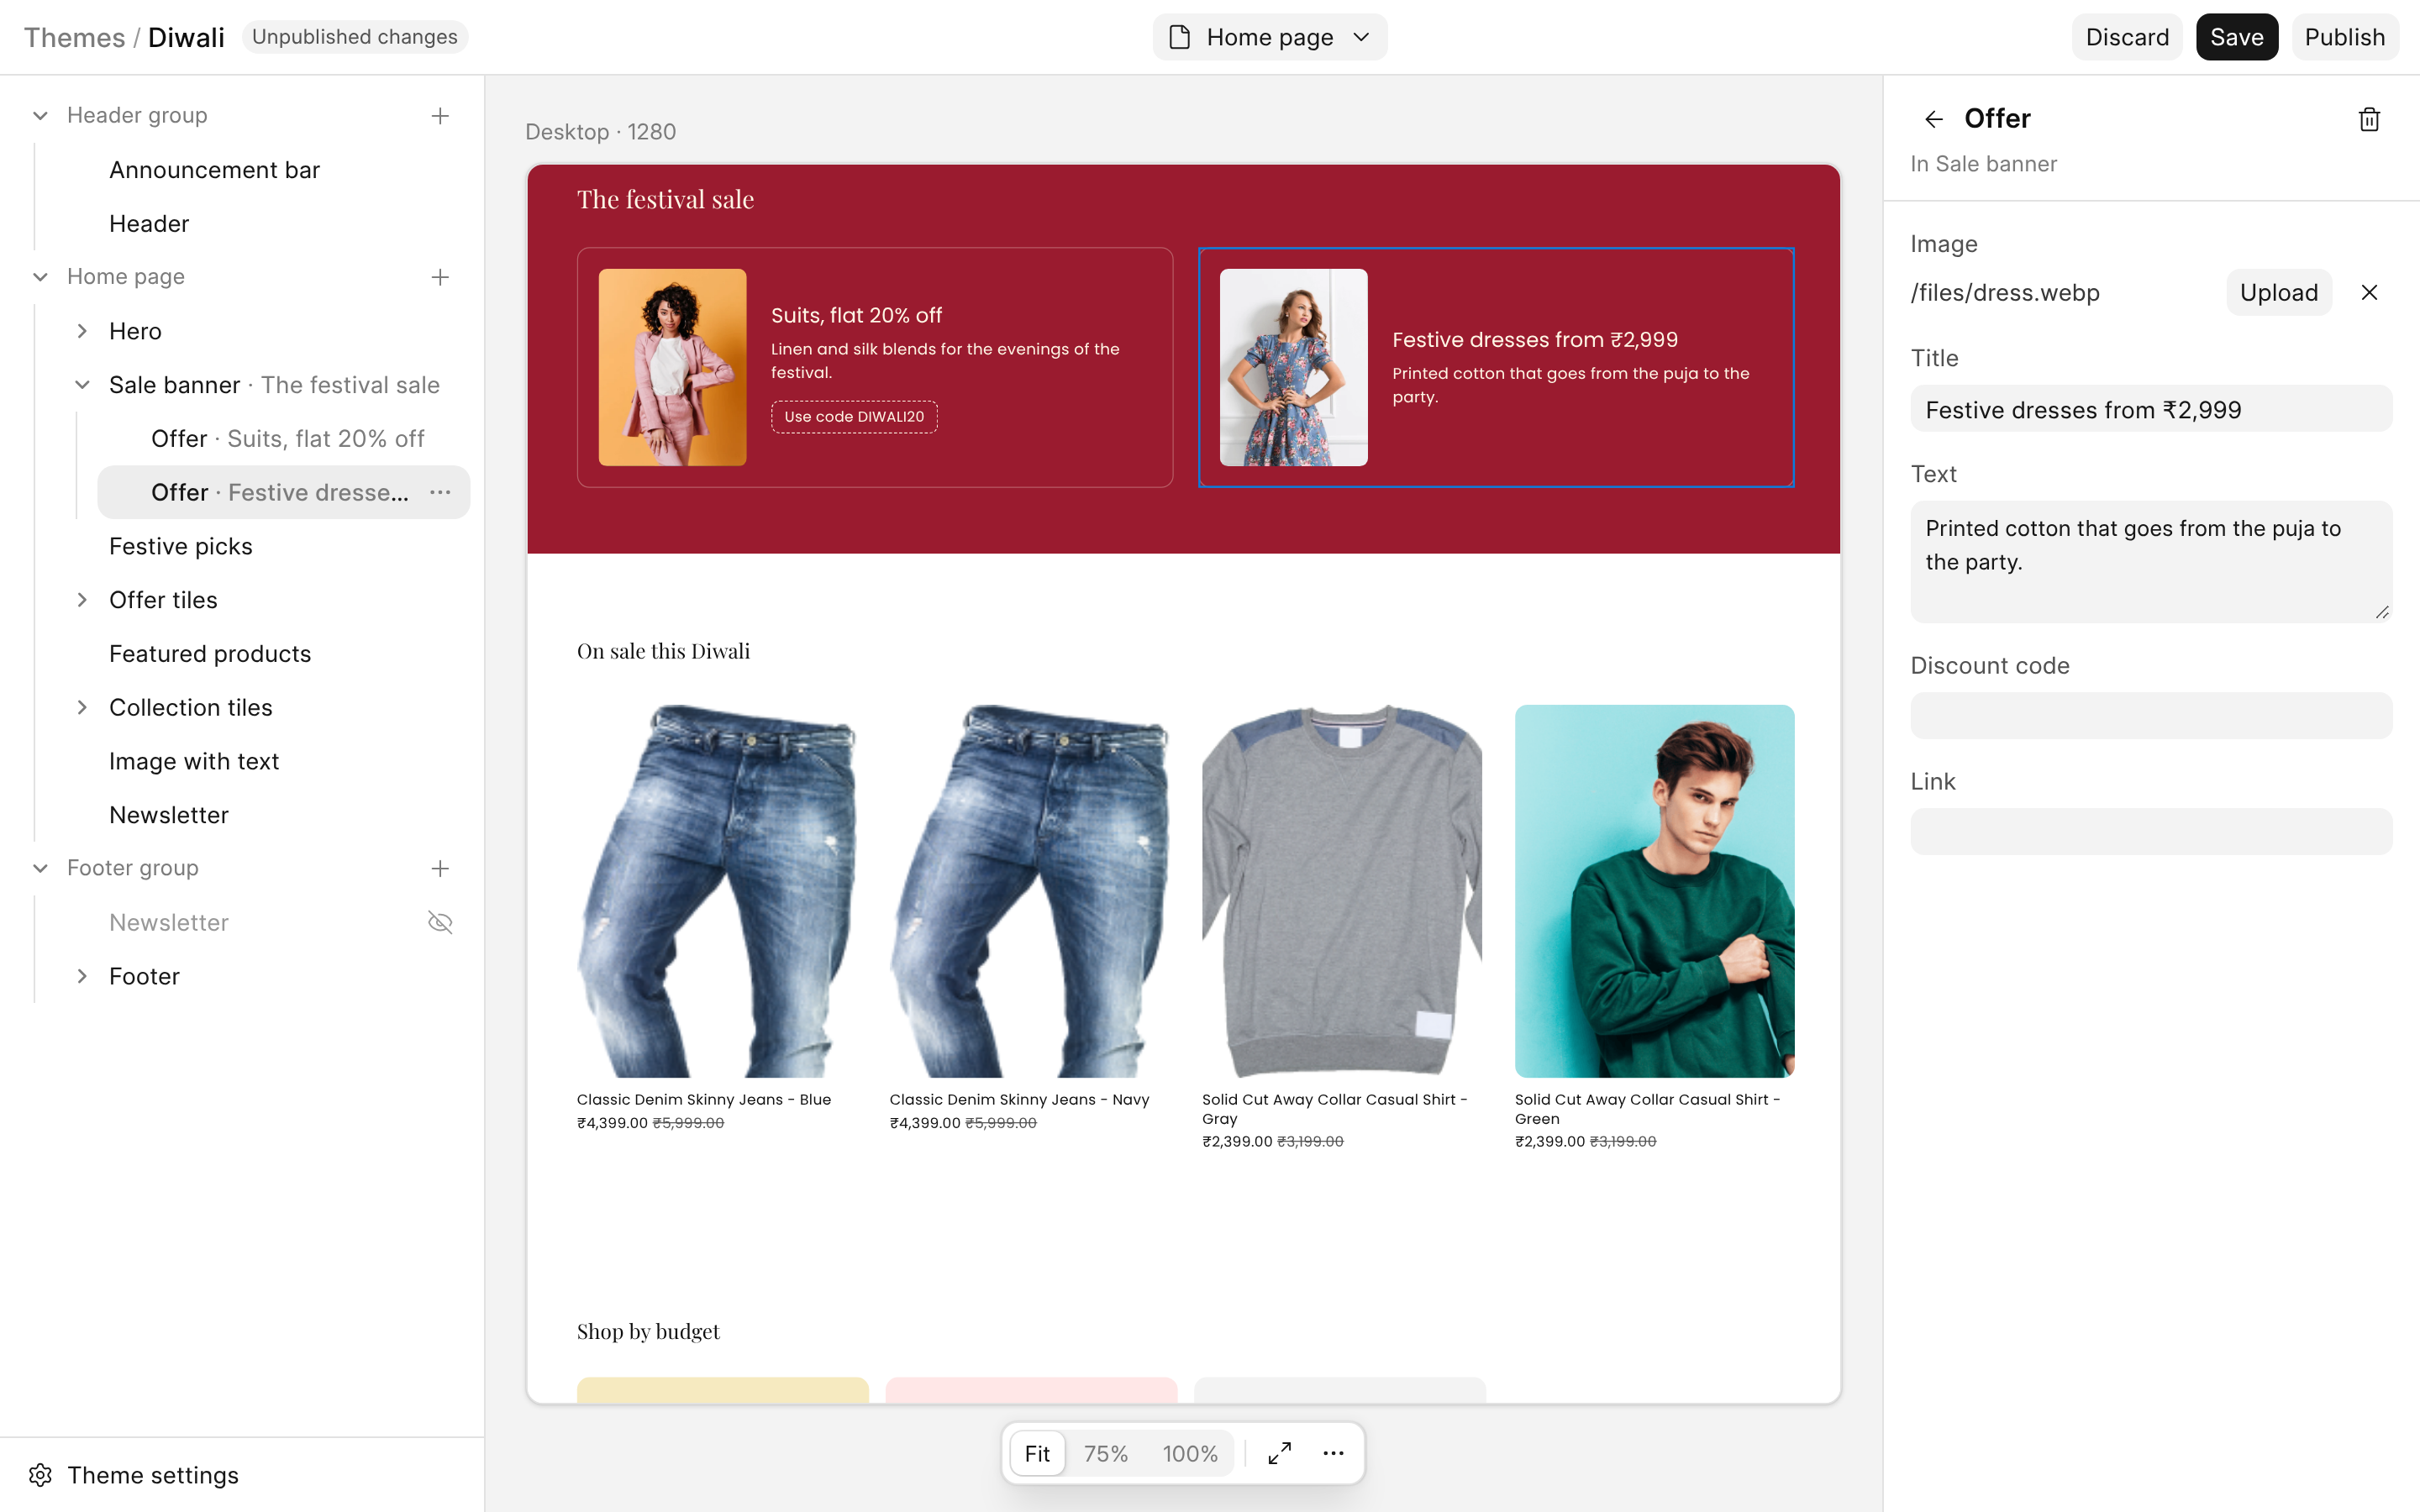
Swap a photo. Click the arrow next to Sale banner, then click the second Offer. Click Upload next to Image and choose a photo from the computer.
-
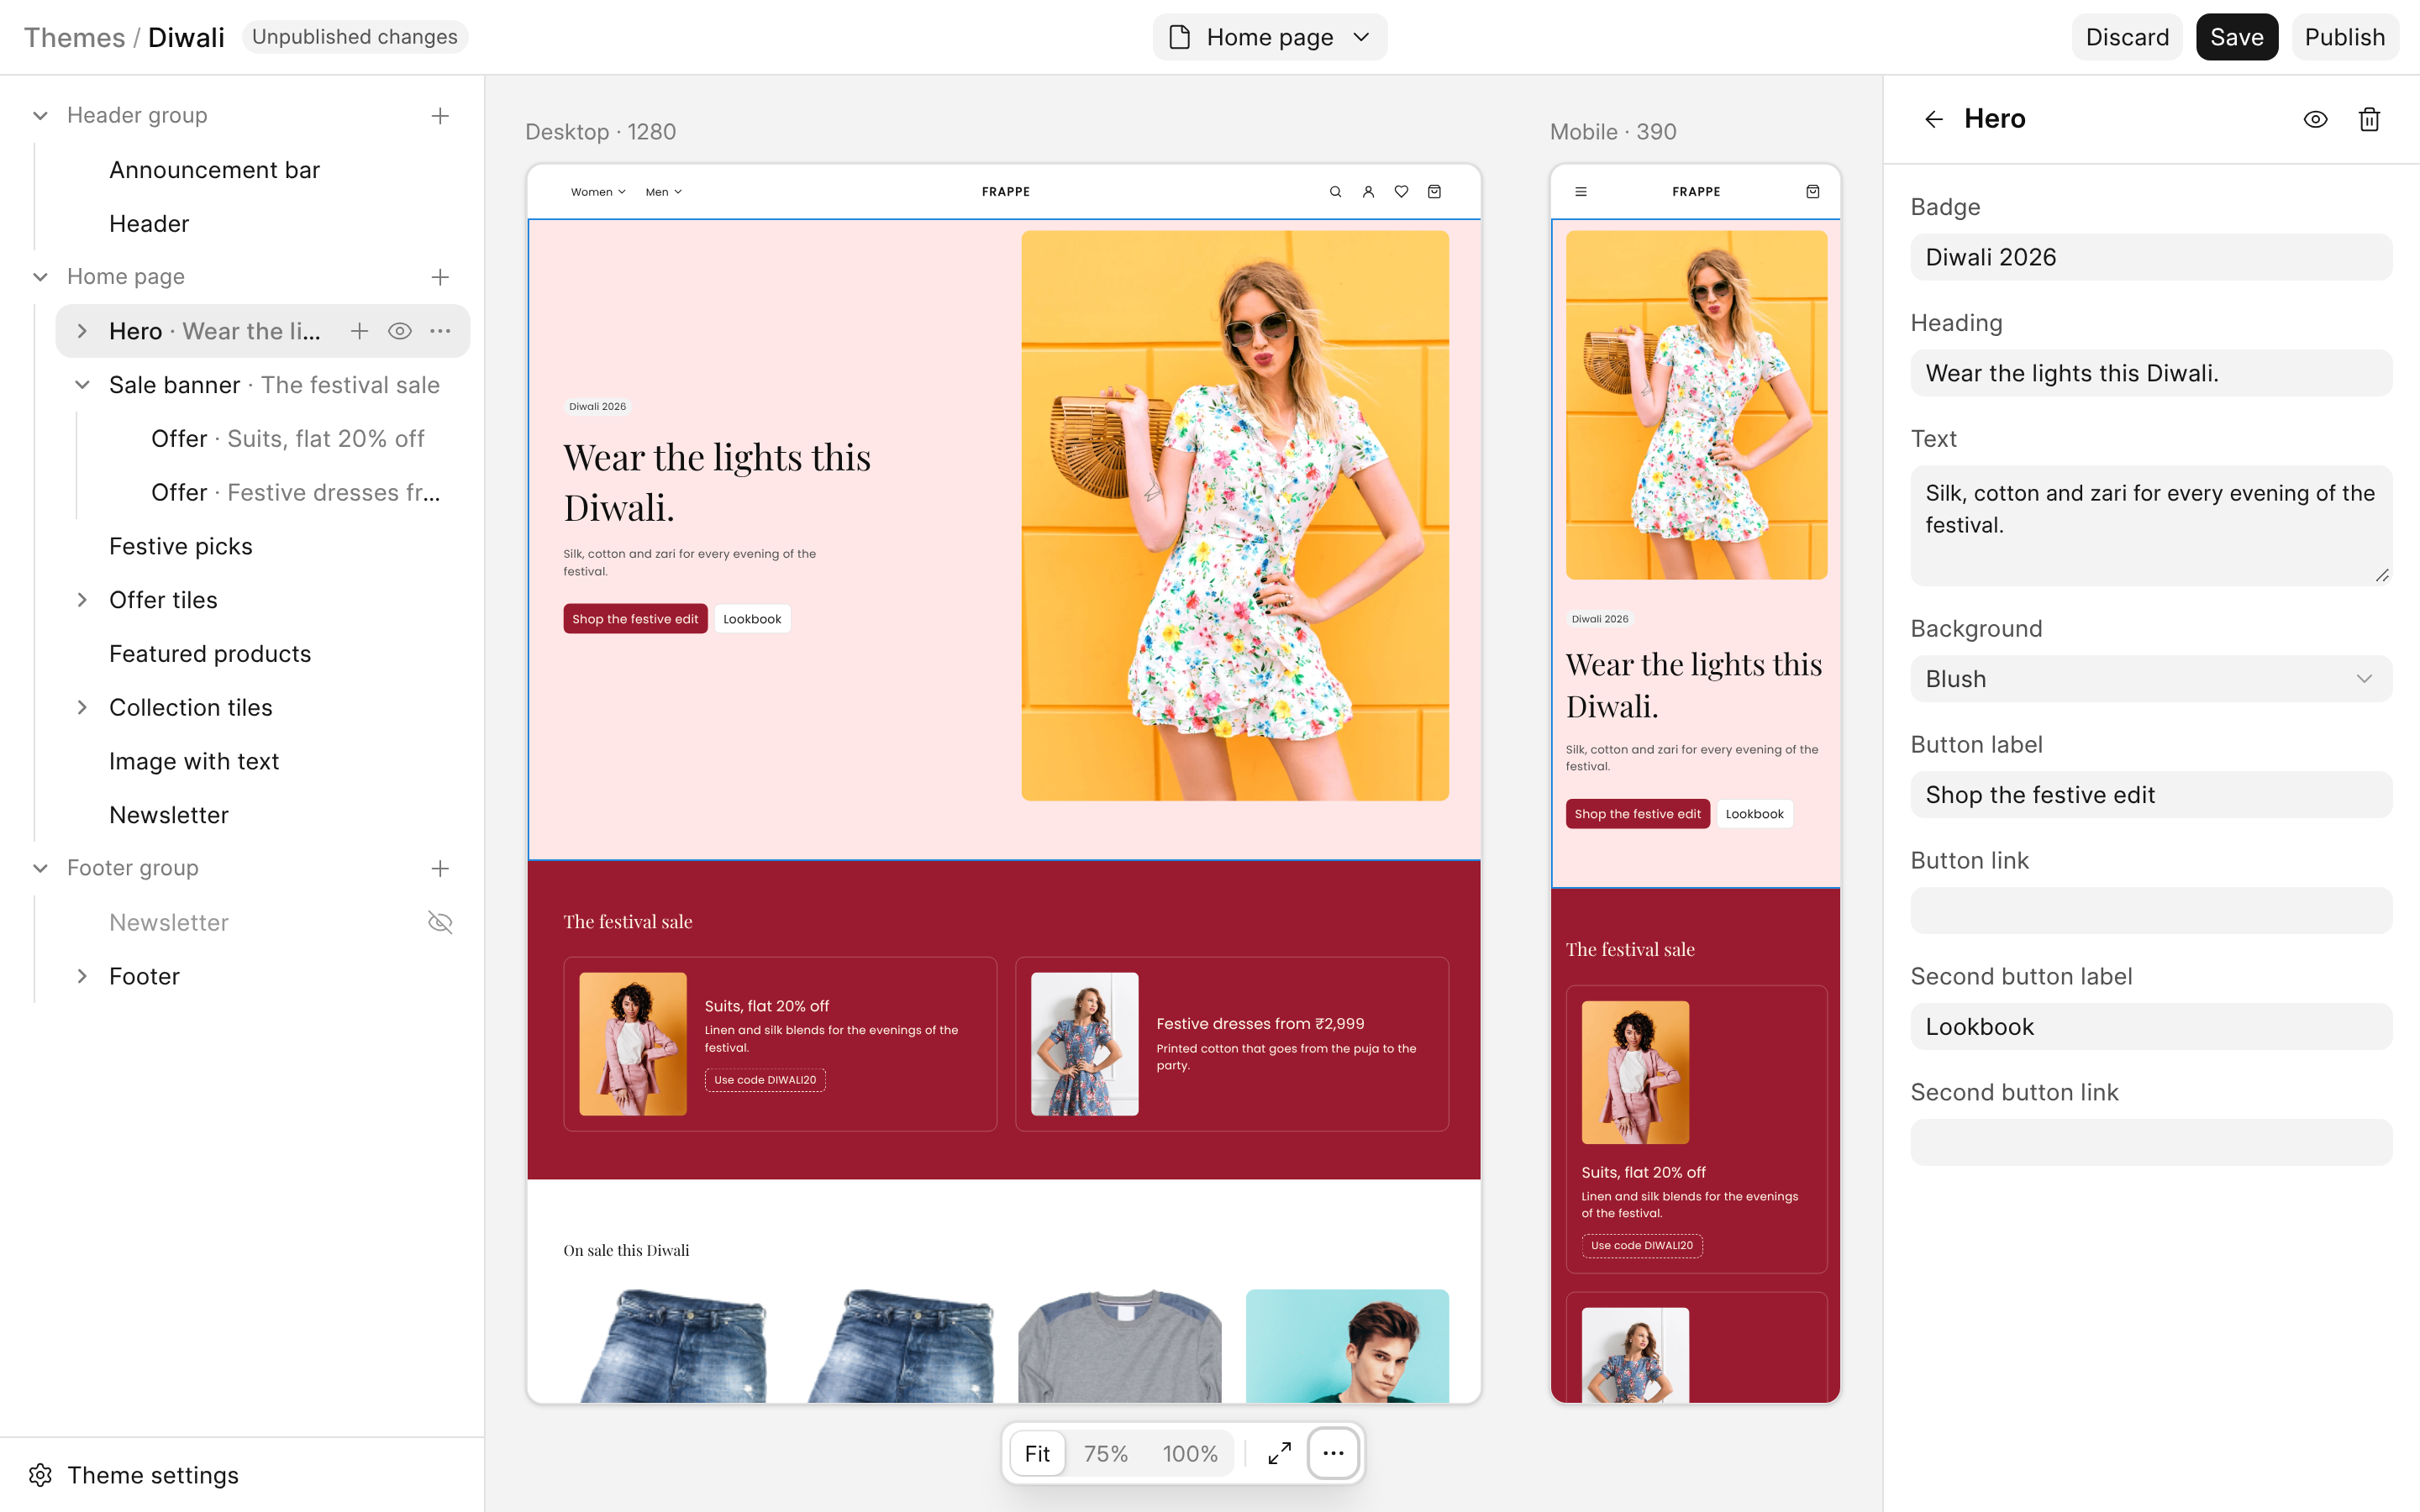
Compare desktop and mobile. Click the ... button under the preview, and choose Desktop and mobile, the third icon.
-
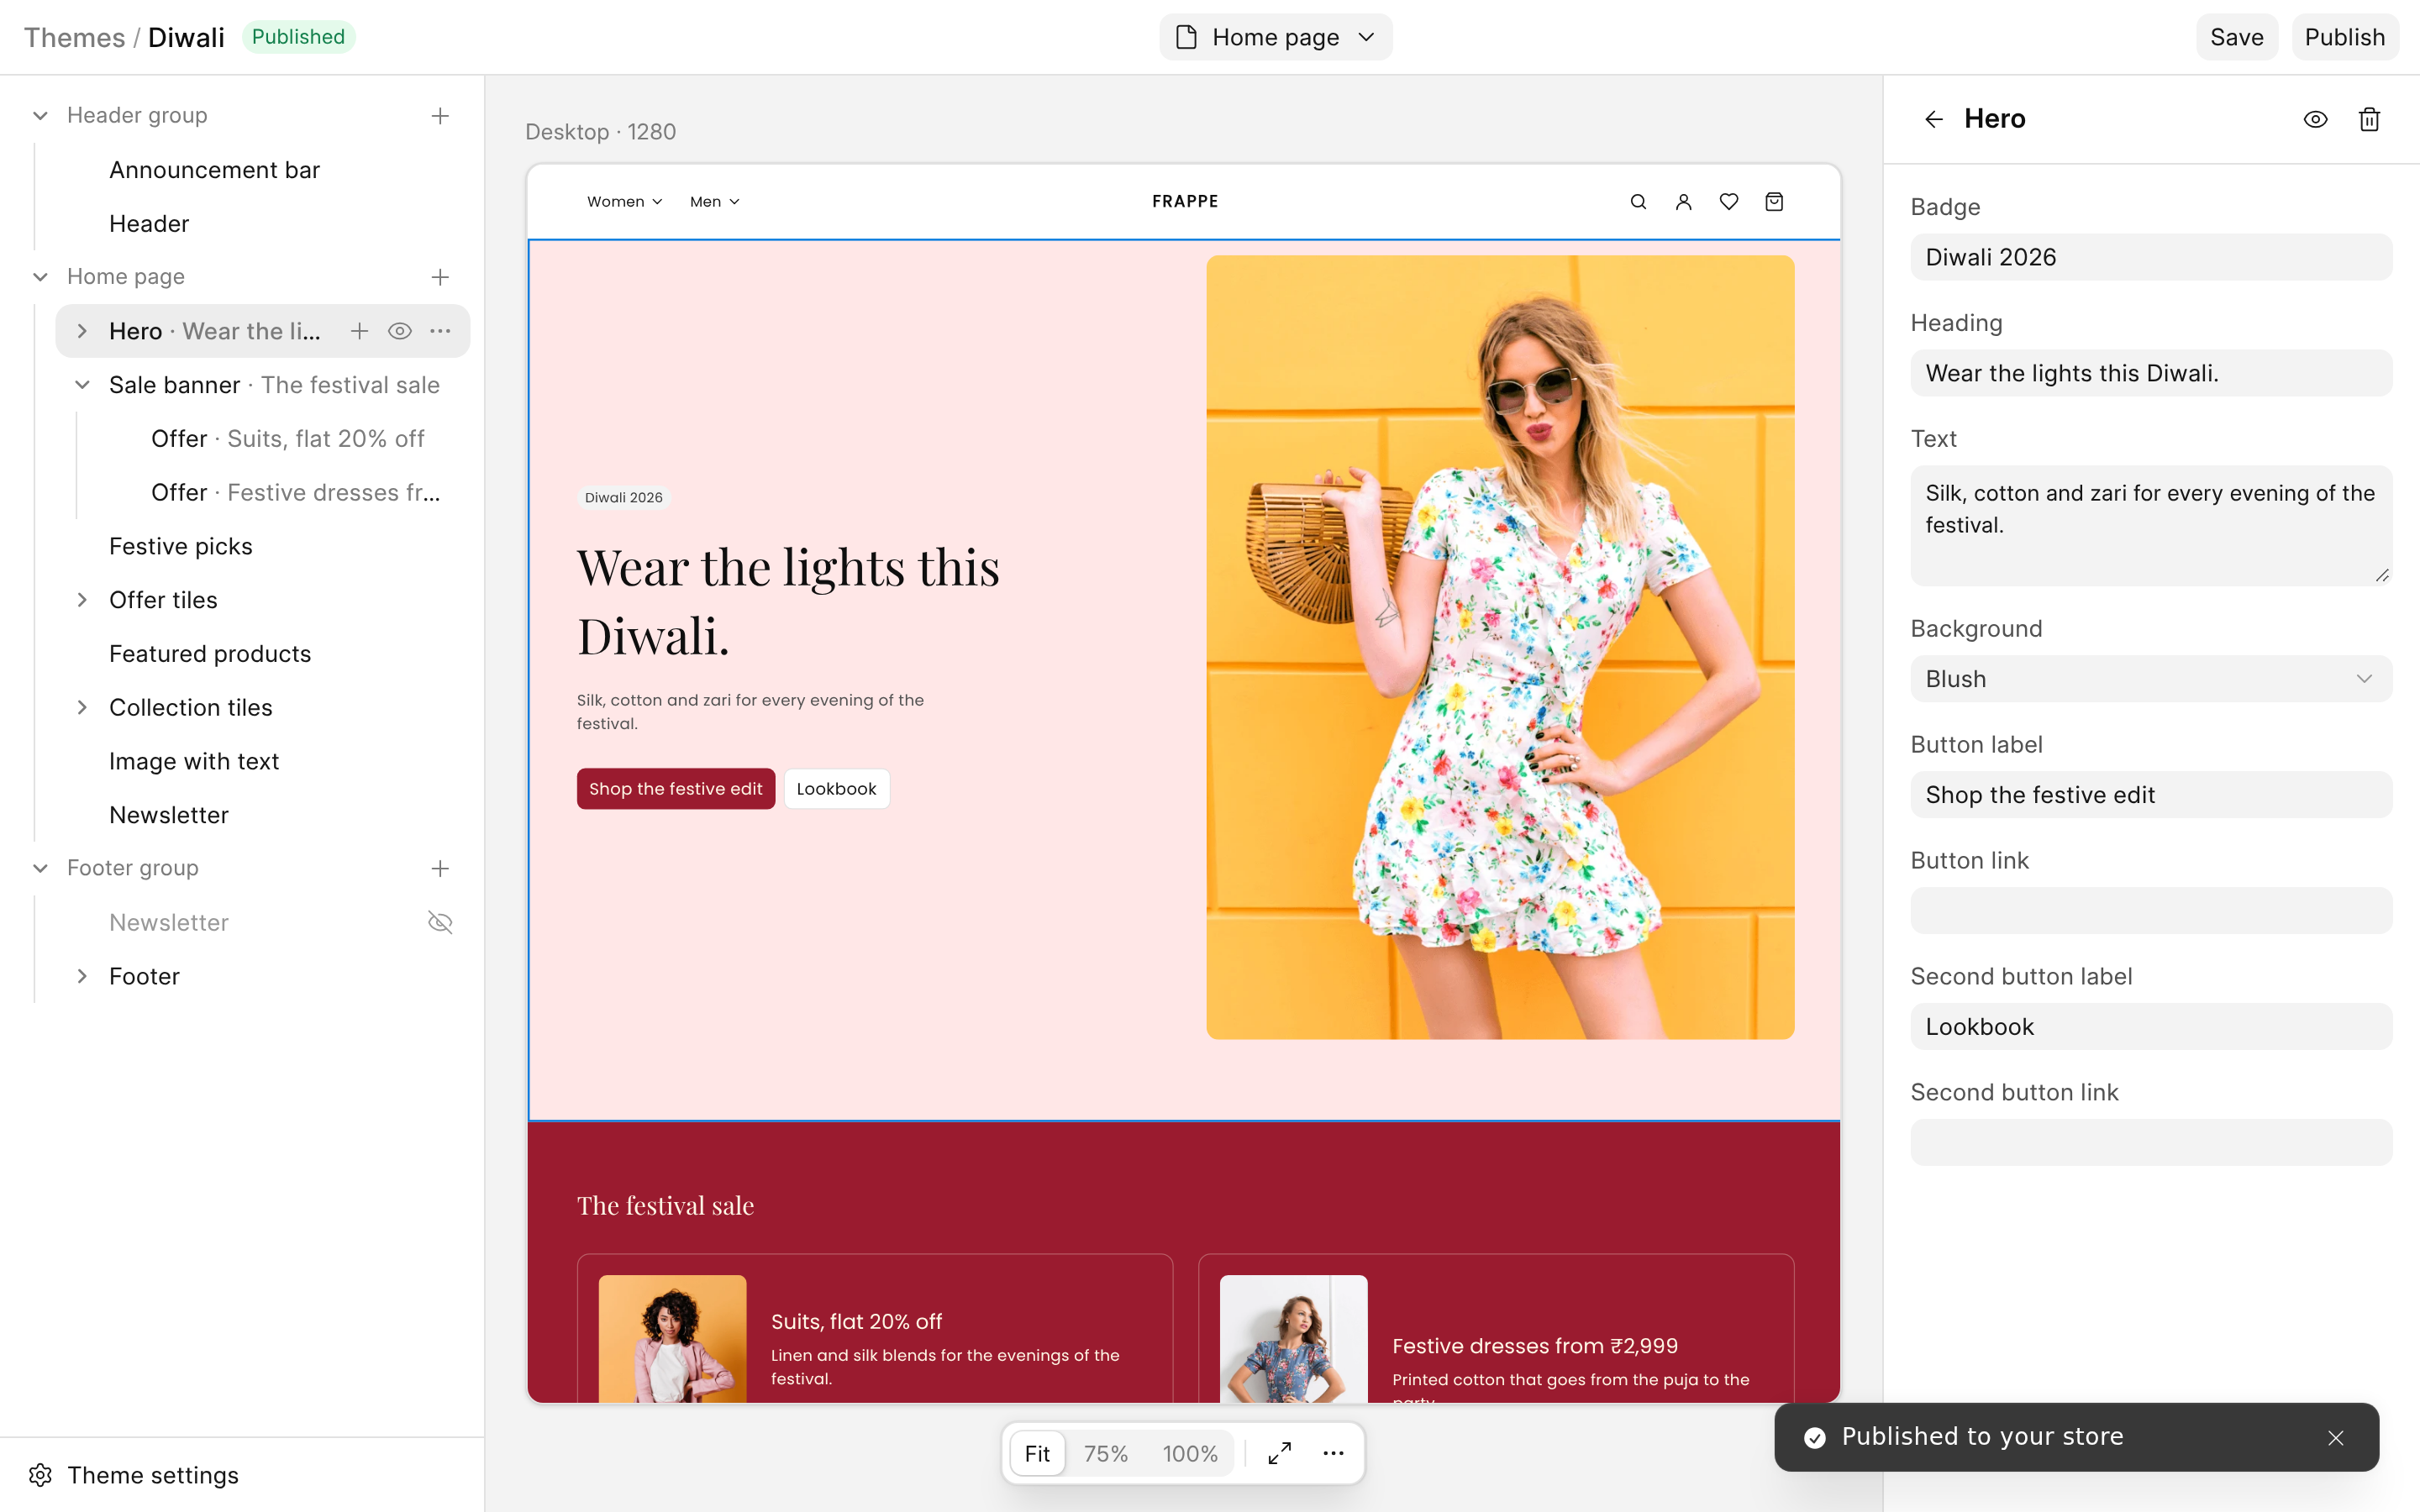
Click Save, then Publish. Save keeps the changes as a draft, and the badge at the top says Unpublished changes. Publish puts them on the store.
Colours and fonts are separate
Colours and fonts are not in a section. The client opens Theme settings, at the bottom left, and changes Brand Colour or a font. This panel has its own Save button at the bottom, apart from the Save and Publish at the top.
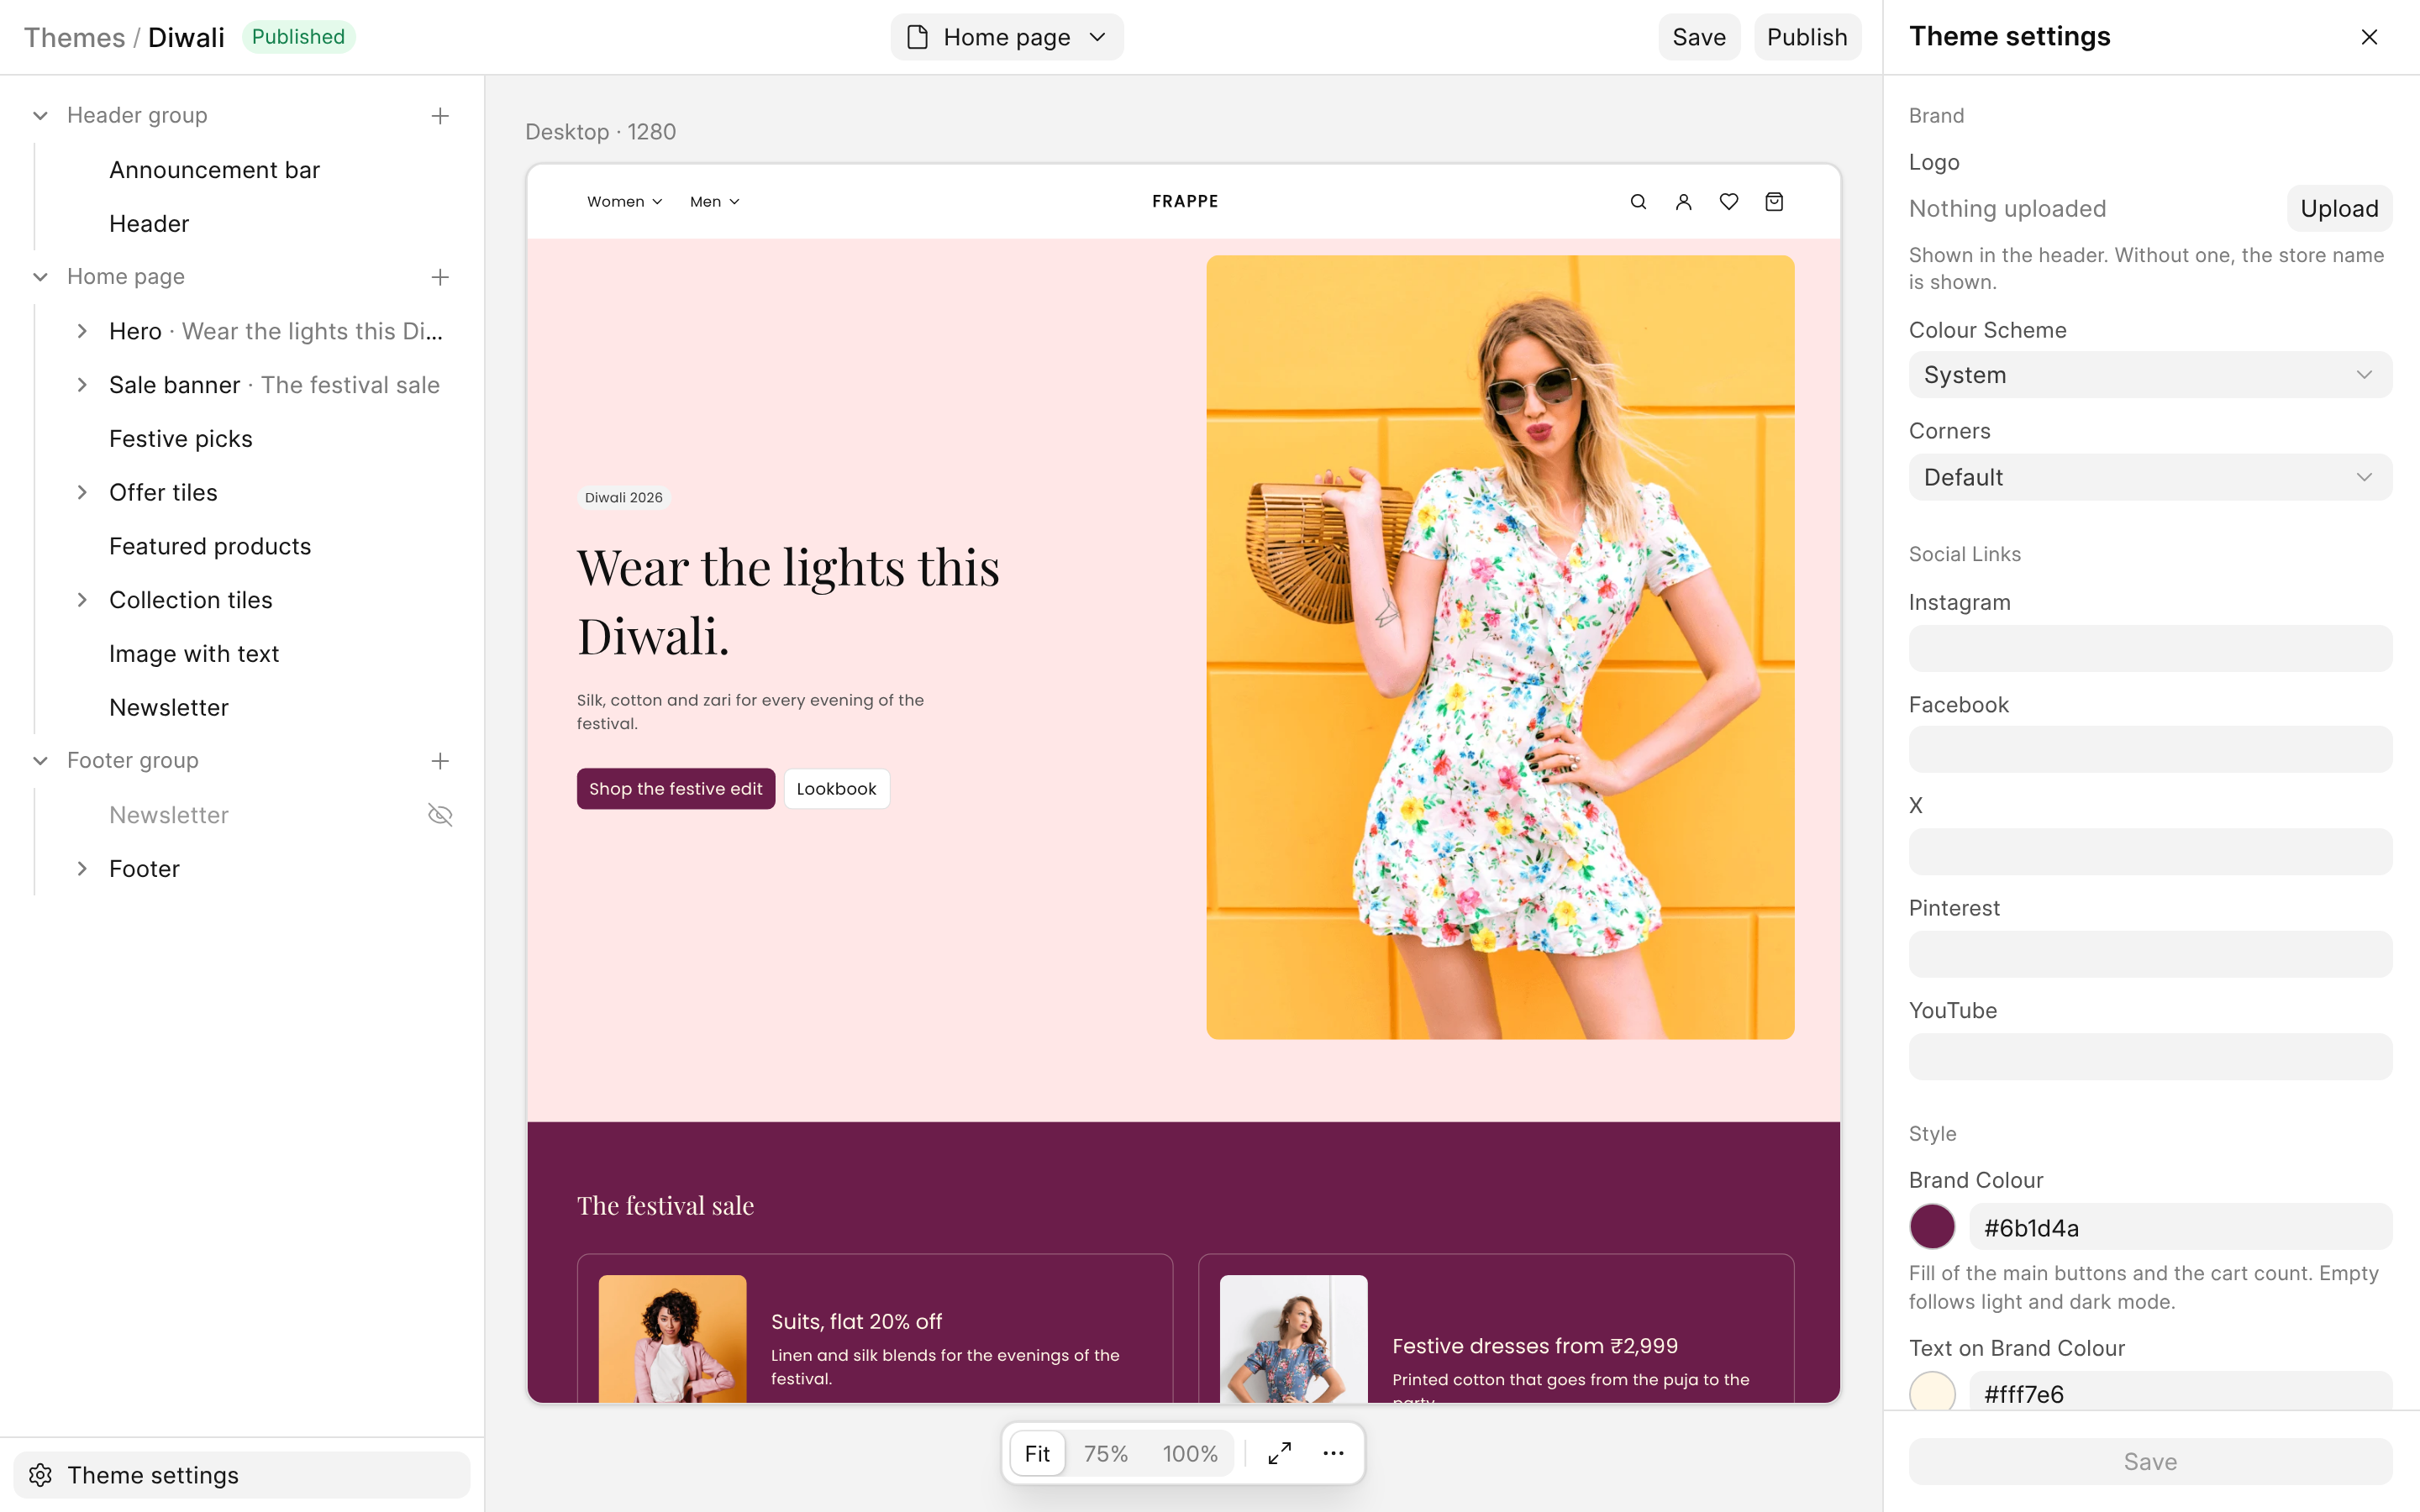
The change reaches the store as soon as the panel's Save is clicked. Publish is not needed.
What to tell your client
- Save keeps a draft. Publish makes it live.
- Colours and fonts have their own Save, and need no Publish.
- Photos they upload are kept on the site. They are not in your app.
- Their changes stay on their site. If you change a section file later, a page they have published does not pick it up. Ship it explains why.